
I remember the first time I made Stars-and-Stripes Gelatin for a Fourth of July barbecue. It was a hot summer day, and the sun poured down like a golden spotlight on our backyard. My kids were running around, their laughter echoing as they tried to catch fireflies, while the smell of grilled burgers wafted through the air. I wanted to whip up something festive and fun to celebrate our country, so I decided to make this vibrant, layered gelatin dessert. As I layered the red, white, and blue colors, I couldn’t help but feel a rush of excitement. The kids gathered around, eyes wide, as the colors transformed into a beautiful, patriotic treat.
When I finally brought it out to the table, the oohs and aahs were priceless. Everyone wanted to know how I created such a striking dessert. It felt like a mini masterpiece, and the best part? It tasted just as good as it looked! Stars-and-Stripes Gelatin quickly became a family favorite, not just for its stunning appearance but also for the nostalgic memories it created. Now, every summer, it’s a staple at our celebrations, reminding us of those joyful moments.
Why This Stars-and-Stripes Gelatin Recipe Will Become Your Go-To
This Stars-and-Stripes Gelatin isn’t just another dessert; it’s a showstopper. The layers of gelatin not only create a visual delight but also offer a refreshing taste that balances sweetness with a hint of tartness. What sets this recipe apart is the use of natural fruit juices for flavoring. You can easily adjust the sweetness based on your preference, making it a hit with both kids and adults. Plus, it’s a no-bake dessert, which means less time in the kitchen and more time enjoying the festivities.
You’ll love how versatile this recipe is. Whether you’re celebrating Independence Day, a birthday, or just a sunny weekend, Stars-and-Stripes Gelatin fits right in. The best part? It’s easy to customize. Swap out the flavors or even add fresh fruit between the layers for an extra surprise. This gelatin dessert not only looks beautiful on any dessert table, but it also brings a sense of nostalgia and togetherness.
The Secret Behind Perfect Stars-and-Stripes Gelatin
The secret to perfect Stars-and-Stripes Gelatin lies in the method of layering. This technique creates those eye-catching stripes that make the dessert pop. Each layer needs to be properly set before adding the next, ensuring that each color stands out vividly. Patience is key here, but I promise it’s worth the wait. Using high-quality gelatin will also enhance both the texture and flavor. Plus, infusing fruit juices adds a fresh twist that elevates the entire dessert experience.
Essential Ingredients You’ll Need
To whip up this delightful Stars-and-Stripes Gelatin, you’ll need:
Gelatin powder – This is the base of your treat, providing the perfect texture.
Cold water – Essential for blooming the gelatin.
Fruit juice – Choose your favorites, like cherry and blueberry, for the red and blue layers.
Sugar – For that touch of sweetness, balancing the tangy fruit flavors.
Whipped cream – Optional, but it adds a lovely creaminess and visual appeal.
Fresh fruit – Optional, for garnishing and adding a fresh twist.
Step-by-Step Stars-and-Stripes Gelatin Instructions
Creating your Stars-and-Stripes Gelatin is a fun process that brings a splash of color to any gathering. The entire process takes about 4-5 hours, including setting time, so plan accordingly. You’ll need a mixing bowl, a whisk, a measuring cup, and a rectangular baking dish.
1- Start by blooming the gelatin. In a bowl, mix the gelatin powder with cold water. Let it sit for about 5 minutes until it’s fully absorbed and thickened.
2- Next, prepare the red layer. In a saucepan, combine cherry juice and sugar over medium heat until the sugar dissolves. Stir in the bloomed gelatin and remove from heat. Pour this mixture into your baking dish and chill for about 1-2 hours until it’s set.
3- Now, for the white layer. Repeat the same process using cold water, gelatin, and a mix of sugar with whipped cream for creaminess. Once the red layer is firm, pour the white mixture over it and chill for another hour.
4- After the white layer has set, repeat the process for the blue layer using blueberry juice. Pour it over the white layer and chill until completely set, about another 1-2 hours.
5- Once all layers are firm, cut the gelatin into squares or fun shapes.
6- For a beautiful presentation, serve with a dollop of whipped cream and fresh fruit on top.
Pro Tips for Success
To ensure your Stars-and-Stripes Gelatin turns out perfectly, keep these tips in mind:
- Make sure each layer is completely set before adding the next one. This prevents colors from bleeding into each other.
- Use quality fruit juices for the best flavor.
- If you see bubbles in the gelatin, gently tap the dish on the counter to release them before it sets.
- Don’t rush the chilling process; patience is key for those stunning layers!
Serving and Storing Your Stars-and-Stripes Gelatin
Perfect Pairings for Stars-and-Stripes Gelatin
Stars-and-Stripes Gelatin pairs beautifully with summer barbecues, picnics, or any festive gathering. Serve it alongside grilled meats like burgers or hot dogs for a classic American feel. It also complements fresh fruit salads and light beverages, like lemonade or iced tea. For a fun twist, consider serving it with a scoop of vanilla ice cream on the side!
Storage and Make-Ahead Tips
You can store your Stars-and-Stripes Gelatin in the fridge for up to five days, covered lightly with plastic wrap. If you want to make it ahead of time, prepare it a day before your gathering. Just remember to keep it chilled until serving. It’s a perfect make-ahead dessert that saves you time on the day of your celebration.
Variations and Dietary Adaptations for Stars-and-Stripes Gelatin
Creative Stars-and-Stripes Gelatin Variations
Feel free to get creative with your Stars-and-Stripes Gelatin! You can swap the fruit juices for seasonal flavors like mango or passion fruit for a tropical twist. Add layers of fresh berries between the gelatin for added texture and flavor. You could even make a Halloween version using orange and black layers!
Making Stars-and-Stripes Gelatin Diet-Friendly
If you have dietary restrictions, don’t worry! You can easily make this dessert gluten-free by ensuring that your gelatin is certified gluten-free. For a vegan version, substitute gelatin with agar-agar and use plant-based juices and cream alternatives. Adjust the sugar to your liking, making it suitable for low-carb diets as well.
Frequently Asked Questions
Q: Can I substitute fruit juices with syrups?
A: Yes, you can use flavored syrups, but keep in mind that this may alter the sweetness and texture of the final product.
Q: How long does it take for each layer to set?
A: Typically, each layer should set for about 1-2 hours before adding the next, but you can check for firmness to be sure.
Q: How should I store leftovers?
A: Store your leftover Stars-and-Stripes Gelatin in the fridge for up to five days, covered with plastic wrap to prevent drying out.
Q: How many servings does this recipe make?
A: This recipe makes around 12-15 servings, depending on how large you cut the pieces.
Q: What if my gelatin doesn’t set properly?
A: If your gelatin doesn’t set, it may be due to incorrect ratios of liquid to gelatin. Make sure to follow the recipe accurately and use fresh gelatin.
Stars-and-Stripes Gelatin
- Total Time: 240
- Yield: 12 servings
- Diet: Vegetarian
Description
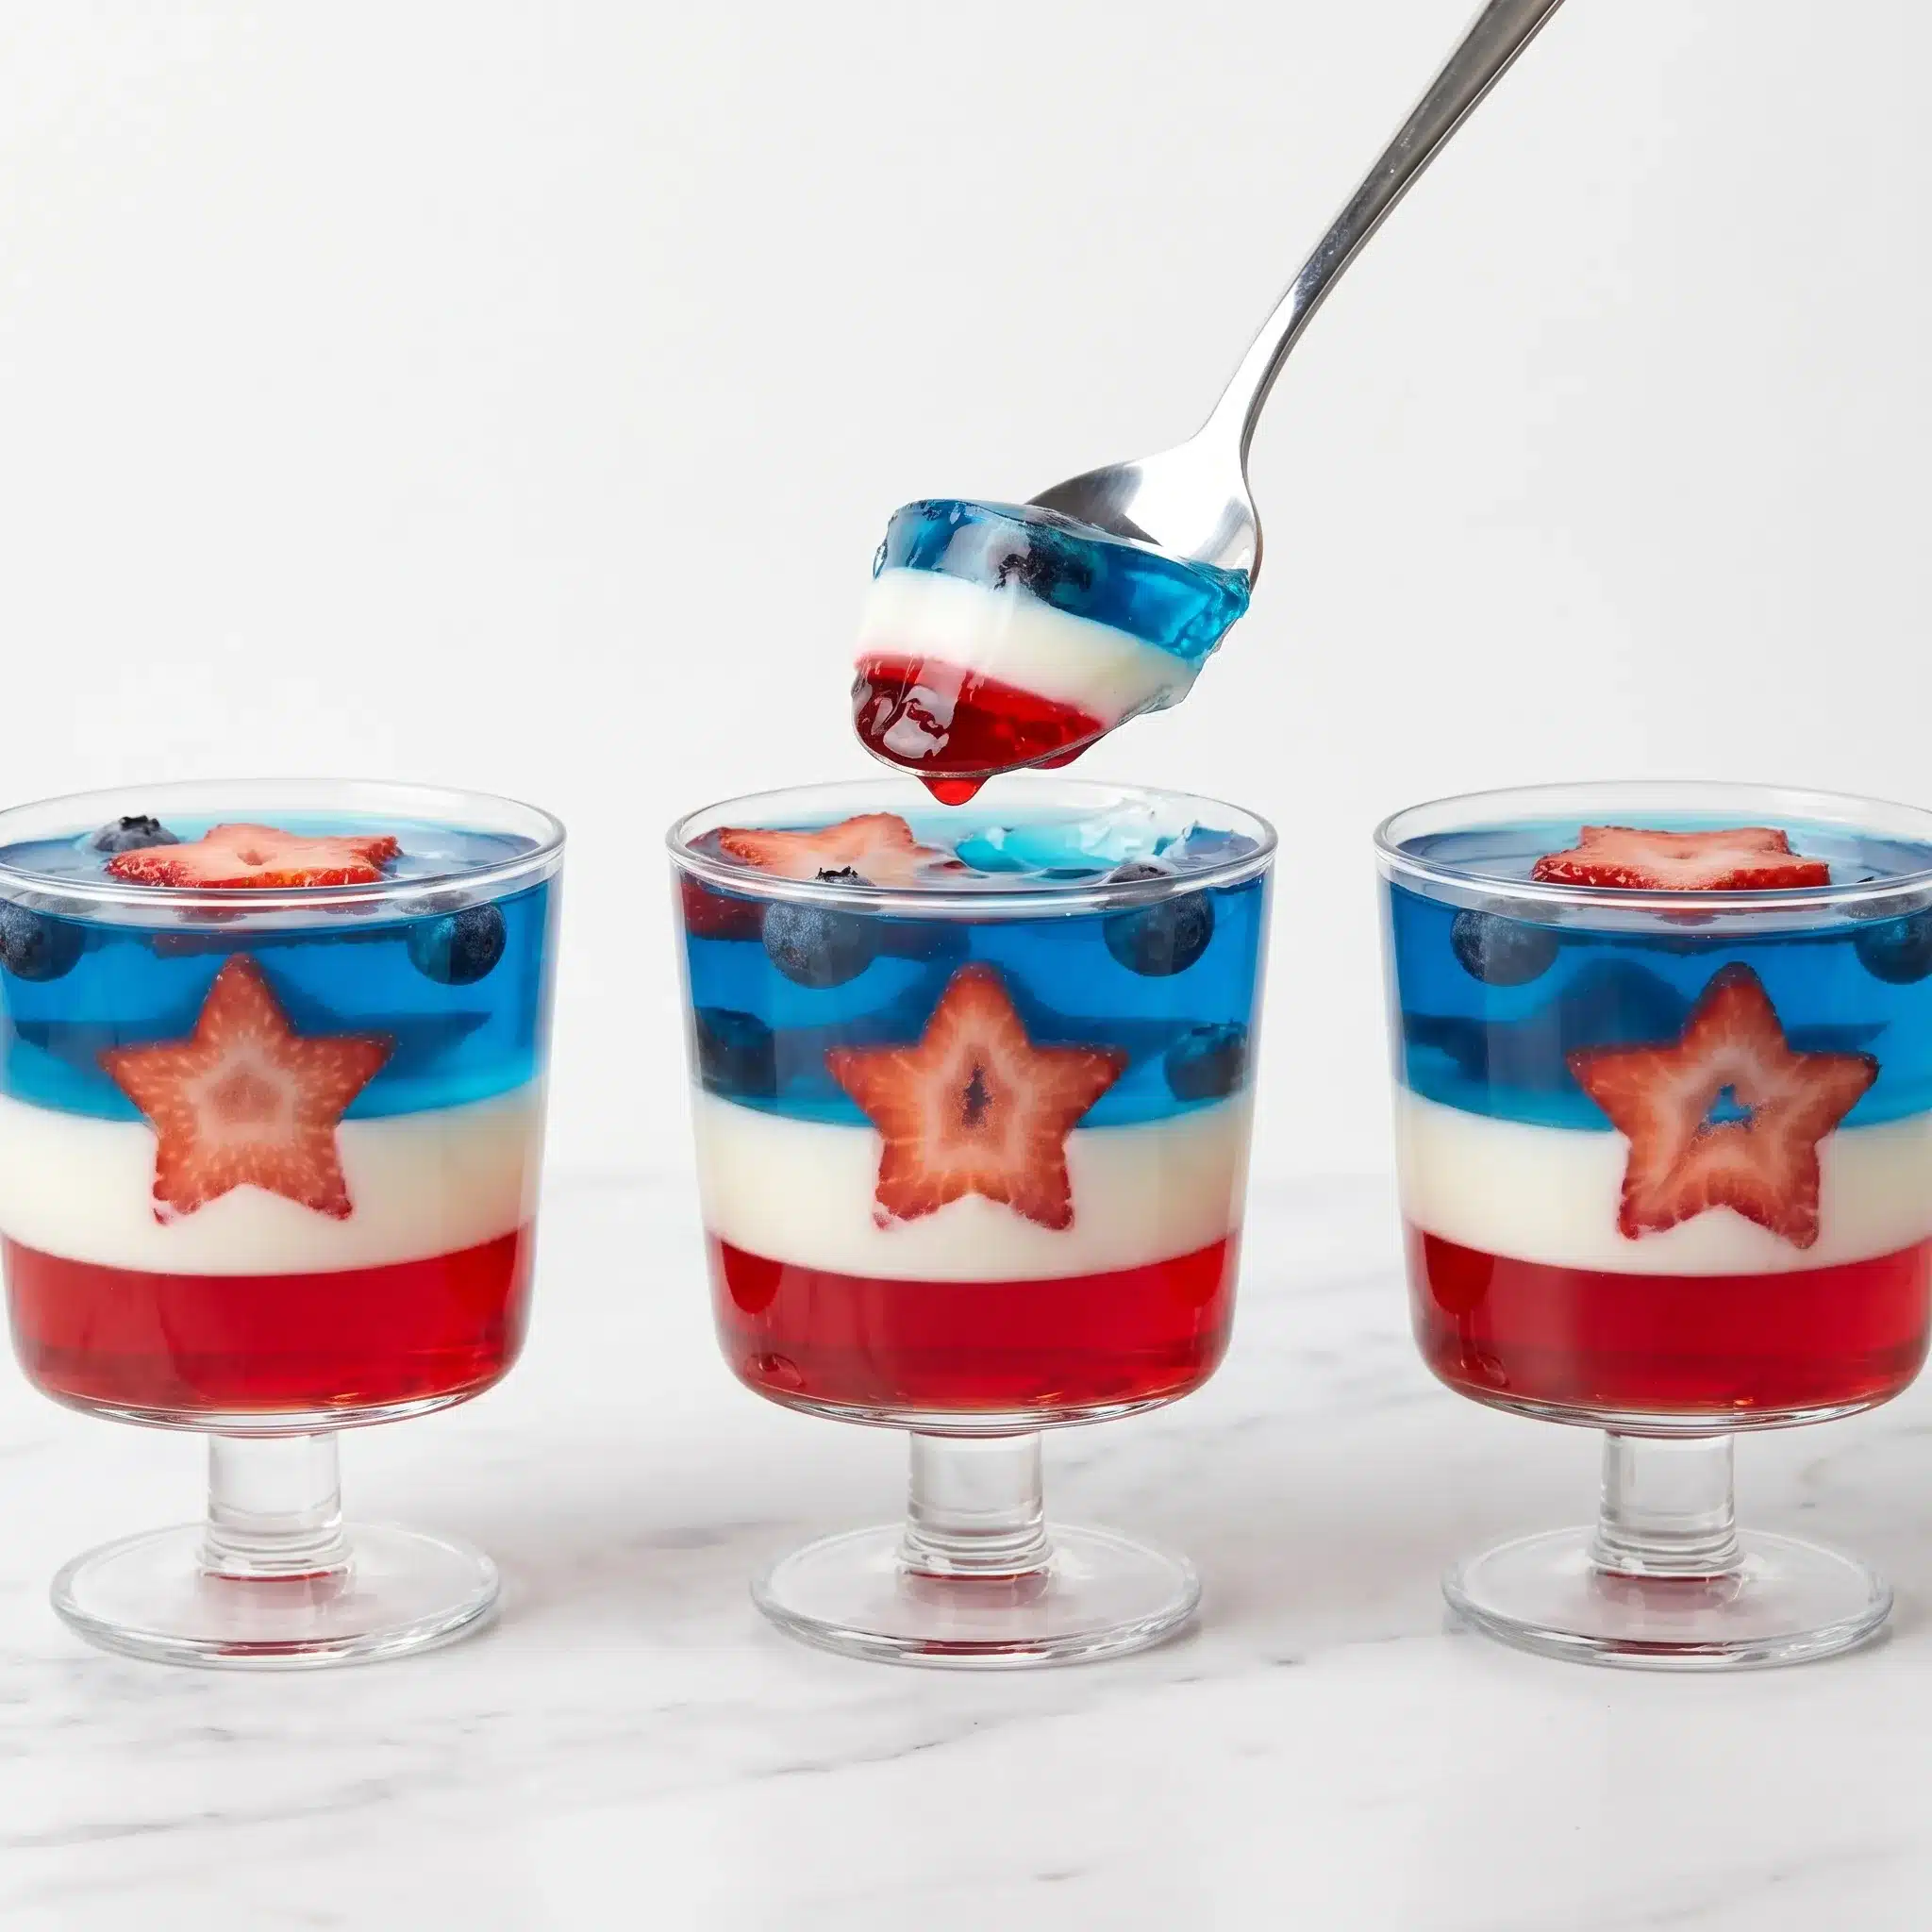
Stars-and-Stripes Gelatin is a fun and festive dessert that’s sure to impress at any summer gathering. With its vibrant layers of red, white, and blue, this gelatin treat is not only visually stunning but also incredibly easy to make!
Ingredients
– 1 cup boiling water
– 1 package (3 oz) cherry gelatin
– 1 cup cold water
– 1 cup boiling water
– 1 package (3 oz) blue raspberry gelatin
– 1 cup cold water
– 1 package (3 oz) unflavored gelatin
– 1 cup cold water
– 1 can (14 oz) sweetened condensed milk
– Fresh berries for garnish (optional)
Instructions
1. In a bowl, dissolve cherry gelatin in 1 cup of boiling water; stir until fully dissolved. Add 1 cup of cold water and mix well.
2. Pour the cherry gelatin into a 9×13 inch dish and refrigerate until set, about 1-2 hours.
3. In another bowl, dissolve blue raspberry gelatin in 1 cup of boiling water; add 1 cup of cold water and mix.
4. Once the cherry layer is set, carefully pour the blue raspberry gelatin over it and return to the fridge for another 1-2 hours.
5. For the final layer, dissolve unflavored gelatin in 1 cup of cold water, then mix in sweetened condensed milk.
6. Pour this mixture over the blue raspberry layer and refrigerate until fully set, about 2 hours.
7. Once set, cut into squares and serve with fresh berries, if desired.
Notes
For best results, allow each layer to set completely before adding the next. You can also use different flavored gelatins to customize your dessert!
- Prep Time: 30
- Category: Snacks & Desserts
- Method: No-Bake
- Cuisine: American
Conclusion
I can’t wait for you to try this Stars-and-Stripes Gelatin recipe at your next celebration! It’s not just a dessert; it’s a way to create beautiful memories with family and friends. So, grab your ingredients and get ready to impress your guests. I’d love to hear how it turns out, so don’t forget to drop a comment and share your own stories! Happy cooking!