
Growing up in Istanbul, the aroma of freshly baked Turkish bread would waft through the narrow streets, luring me and my friends to the local bakery. The sound of the wooden peel sliding in and out of the brick oven, followed by the satisfying thud as a steaming loaf was placed on the counter – it’s a sensory experience I’ll never forget. There was something truly magical about tearing into that crisp, golden crust and sinking my teeth into the soft, pillowy interior. It was more than just sustenance; it was a connection to my cultural heritage and the comforting traditions of my childhood.
Why This Turkish Bread Recipe Will Become Your Go-To
The Secret Behind Perfect Turkish Bread
This Turkish bread recipe isn’t just any ordinary loaf – it’s the result of years of perfecting traditional techniques passed down through generations. What sets it apart is the perfect balance of chewiness and airiness, achieved through a careful proofing process and the use of high-quality, authentic ingredients. Whether you’re serving it alongside a hearty stew, using it to soak up the last bits of a delicious dip, or simply enjoying it on its own, this Turkish bread will quickly become a staple in your household.
Essential Ingredients You’ll Need
Flour: The foundation of this recipe is a high-quality bread flour, which provides the structure and texture you expect from a classic Turkish loaf.
Yeast: Active dry yeast is the key to achieving that signature rise and light, airy interior.
Water: The right water temperature is crucial for activating the yeast and ensuring a smooth, well-developed dough.
Salt: A pinch of salt enhances the overall flavor and balances the sweetness of the bread.
Olive Oil: A touch of olive oil adds richness and a subtle Mediterranean flavor.
Step-by-Step Turkish Bread Instructions
Preparing Your Turkish Bread
Get ready to bake up a batch of authentic Turkish bread! This recipe takes a bit of time and patience, but the end result is well worth it. You’ll need about 2 hours of total preparation and cooking time, and the only equipment required is a large mixing bowl, a wooden spoon, and a baking sheet.
1- In a large mixing bowl, combine the bread flour, yeast, and salt. Create a well in the center and pour in the warm water and olive oil. Using a wooden spoon, mix the ingredients together until a shaggy dough forms.
2- Turn the dough out onto a lightly floured surface and knead it for about 10 minutes, until it becomes smooth, elastic, and slightly tacky to the touch. Place the dough in a lightly oiled bowl, cover with a damp towel, and let it rise for 1 hour, or until it has doubled in size.
3- Punch down the dough to release any air bubbles, then divide it into 8 equal pieces. Roll each piece into a smooth, oval-shaped loaf, about 6 inches long. Place the loaves on a parchment-lined baking sheet, cover with a damp towel, and let them rise for an additional 30 minutes.
4- Preheat your oven to 400°F (200°C). Just before baking, use a sharp knife to score the top of each loaf with 3-4 diagonal slashes, about 1/4 inch deep. This will help the bread expand and create that signature crust.
5- Bake the Turkish bread for 20-25 minutes, or until the crust is a deep golden brown and the interior is cooked through. The loaves should sound hollow when tapped on the bottom.
6- Remove the freshly baked Turkish bread from the oven and let it cool on a wire rack for at least 10 minutes before serving. Enjoy the warm, fragrant loaves with your favorite dips, soups, or simply on their own.
Pro Tips for Success
- Make sure to use water that’s lukewarm, around 110°F (43°C), to ensure the yeast activates properly.
- Kneading the dough for the full 10 minutes is crucial for developing the gluten and achieving the perfect texture.
- Don’t be tempted to skip the second rise – this extra time allows the flavors to develop and the bread to get its signature chewiness.
- Scoring the tops of the loaves before baking helps them expand evenly and creates that classic Turkish bread look.
Serving and Storing Your Turkish Bread
Perfect Pairings for Turkish Bread
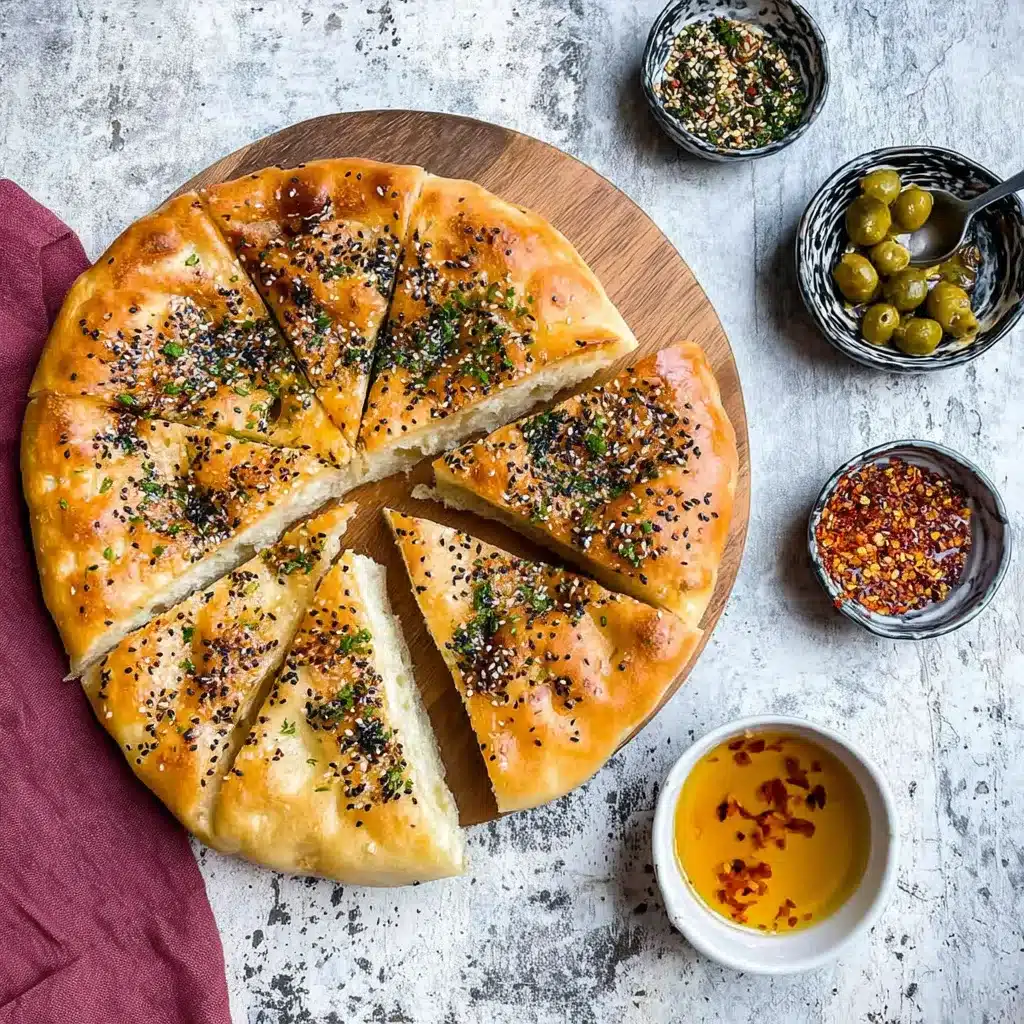
Turkish bread is incredibly versatile and can be enjoyed in so many delicious ways. Serve it alongside a hearty lentil or chickpea stew for a comforting, authentic meal. It also makes a fantastic accompaniment to creamy dips like hummus, baba ghanoush, or labneh. For a simple yet satisfying snack, tear off pieces of the bread and dip them in high-quality olive oil and balsamic vinegar.
Storage and Make-Ahead Tips
To store your freshly baked Turkish bread, let it cool completely, then place it in a paper bag or bread box. It will stay fresh for up to 3 days at room temperature. For longer storage, you can slice the loaves and freeze them in an airtight container for up to 2 months. When ready to enjoy, simply reheat the frozen slices in the oven or toaster.
Variations and Dietary Adaptations for Turkish Bread
Creative Turkish Bread Variations
While this recipe showcases the classic Turkish bread, there are plenty of ways to put your own spin on it. Try adding fragrant spices like cumin, caraway, or sesame seeds to the dough. For a touch of sweetness, incorporate dried fruit like raisins or apricots. You can also experiment with different shapes, such as round loaves or braided breads.
Making Turkish Bread Diet-Friendly
Looking to make this Turkish bread recipe more dietary-friendly? For a gluten-free version, simply substitute the bread flour with a high-quality gluten-free flour blend. To make it vegan, omit the olive oil and use a plant-based milk or water instead. And for a lower-carb option, replace a portion of the flour with almond or coconut flour.
Frequently Asked Questions
Q: Can I use all-purpose flour instead of bread flour?
A: While all-purpose flour can work in a pinch, bread flour is really the best choice for this recipe. The higher protein content in bread flour helps create the perfect chewy texture and rise.
Q: How can I tell if the dough has risen enough?
A: The dough should double in size during the first rise, and the second rise should cause the loaves to puff up significantly. Gently press your finger into the dough – if it bounces back slowly, it’s ready to bake.
Q: Can I freeze the baked Turkish bread?
A: Absolutely! Cooled, sliced Turkish bread freezes beautifully. Just be sure to wrap the slices tightly in plastic wrap or foil to prevent freezer burn.
Q: How many people does this recipe serve?
A: This recipe makes 8 individual Turkish bread loaves, which should serve 4-6 people depending on appetite and how the bread is being used.
Q: My Turkish bread turned out dense and heavy – what went wrong?
A: This could be due to underproofing, over-kneading, or using water that’s too hot or cold. Make sure to follow the rise times closely and use lukewarm water to ensure the yeast activates properly.

Turkish Bread
- Total Time: 30
- Yield: 8 servings
Description
Discover the secret to making fluffy, restaurant-quality Turkish Bread at home in just 30 minutes. This irresistible bread is perfect for dipping in olive oil, serving alongside soups and stews, or enjoying as a snack.
Ingredients
– 3 cups (375g) all-purpose flour
– 1 teaspoon salt
– 1 teaspoon active dry yeast
– 1 1⁄4 cups (295 ml) warm water
– 2 tablespoons olive oil, plus more for brushing
Instructions
1. 1. In a large mixing bowl, combine the flour, salt, and yeast. Add the warm water and olive oil, and stir until a shaggy dough forms.
2. 2. Turn the dough out onto a lightly floured surface and knead for about 5 minutes, until the dough becomes smooth and elastic.
3. 3. Place the dough in a lightly greased bowl, cover with a damp towel, and let rise for 15 minutes.
4. 4. Preheat the oven to 450°F (230°C).
5. 5. Punch down the dough to release any air bubbles, then divide it into 8 equal pieces. Roll each piece into a ball and place them on a parchment-lined baking sheet, spacing them about 2 inches apart.
6. 6. Brush the tops of the dough balls with a little olive oil and bake for 12-15 minutes, or until the bread is golden brown.
7. 7. Remove the bread from the oven and serve warm, with additional olive oil for dipping.
Notes
For best results, use warm water (around 110°F/45°C) to activate the yeast. You can also add a sprinkle of sesame seeds or nigella seeds on top of the bread before baking for extra flavor.
- Prep Time: 15
- Cook Time: 15
- Category: Breads & Beverages
- Method: Baking
- Cuisine: Turkish
Conclusion
There’s nothing quite like the aroma and flavor of freshly baked Turkish bread. This recipe captures the essence of that classic, beloved loaf, transporting you to the bustling streets of Istanbul with every bite. Whether you’re serving it as part of a heartwarming meal or simply enjoying it on its own, I’m confident this Turkish bread will quickly become a staple in your household. So, what are you waiting for? Grab your apron and get baking!