
I can still remember the way my grandmother’s kitchen used to smell on a summer afternoon – the sweet, fruity aroma of freshly picked raspberries mingling with the warm, comforting scent of homemade jam simmering on the stove. As a child, I’d eagerly watch her every move, mesmerized by the way she effortlessly transformed those plump, juicy berries into a silky, spreadable delight. It was in those moments, surrounded by the love and care she poured into every step, that I first fell in love with the magic of raspberry jam.
Years have passed, but that cherished memory still fills my heart with warmth and nostalgia. Whenever I make my grandmother’s famous raspberry jam recipe, it’s as if I’m transported back to that cozy kitchen, her gentle voice guiding me through the process. The act of stirring the bubbling pot, carefully skimming off the foam, and then watching the jam thicken to the perfect consistency – it’s a ritual that connects me to my roots and the traditions that have been passed down through generations.
That’s why this raspberry jam recipe has become my absolute go-to, a beloved staple that I turn to again and again. It’s not just a recipe, but a piece of my family’s history, a tangible way to honor the love and wisdom that my grandmother so freely shared. And I can’t wait to share it with you, because I know that once you taste the pure, unadulterated flavor of this homemade raspberry jam, it will become your new favorite as well.
Why This Raspberry Jam Recipe Will Become Your Go-To
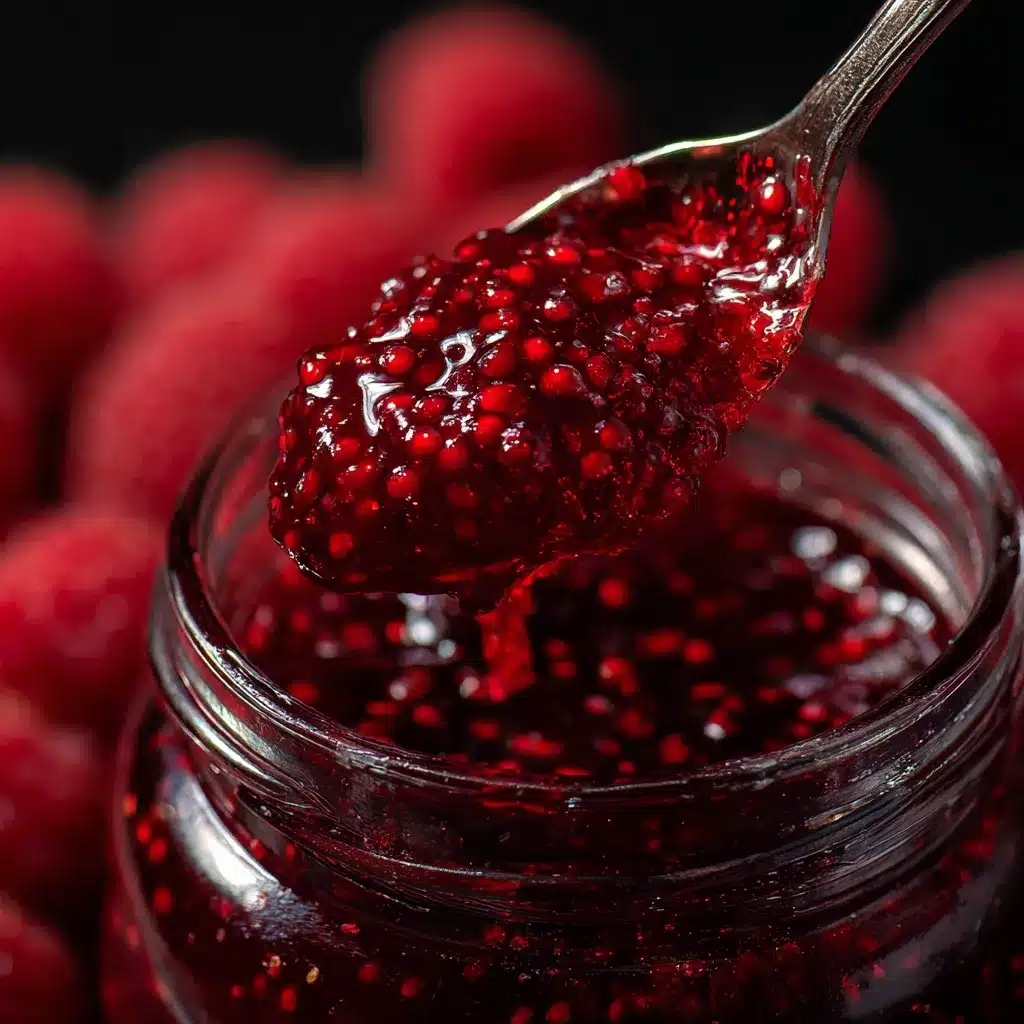
The secret behind this raspberry jam recipe lies in its simplicity and the unwavering quality of its ingredients. There’s no need for artificial thickeners, preservatives, or complicated techniques – just the perfect blend of fresh, ripe raspberries, a touch of sugar, and a little bit of patience. The result is a jam that’s bursting with vibrant flavor, with a luscious texture that simply melts on your tongue.
The Secret Behind Perfect Raspberry Jam Recipe
What sets this raspberry jam recipe apart is the way it captures the true essence of the fruit. By using only the ripest, most flavorful raspberries and allowing them to simmer gently on the stove, the natural sugars and pectin work together to create a jam that’s simultaneously sweet, tart, and utterly irresistible. And the best part? There’s no need for commercial pectin or any other additives – the jam thickens up beautifully on its own, leaving you with a pure, unadulterated taste of summer in every spoonful.
Essential Ingredients You’ll Need
– Fresh, ripe raspberries: The foundation of this recipe, these berries should be at the peak of their season for maximum flavor and sweetness.
– Granulated sugar: Just the right amount of sugar balances the tartness of the raspberries, creating a perfect harmony of flavors.
– Lemon juice: A splash of fresh lemon juice helps to enhance the raspberry flavor and adds a subtle brightness to the jam.
– Salt: A pinch of salt helps to bring out the natural sweetness of the raspberries and creates a more well-rounded flavor profile.
Step-by-Step Raspberry Jam Recipe Instructions
Preparing Your Raspberry Jam Recipe
Making this raspberry jam recipe is a straightforward process that requires just a few simple steps. With a total time of around 45 minutes, including the cooking and cooling time, you’ll be well on your way to creating a homemade treasure that will have your friends and family clamoring for more.
To get started, you’ll need a few basic pieces of equipment: a medium-sized saucepan, a wooden spoon or spatula, a ladle, and some clean, sterilized jars or containers to store your freshly made jam.
1- Gently rinse the raspberries and pat them dry with a clean kitchen towel or paper towels. This will help ensure that the jam cooks up beautifully without any excess liquid.
2- In a medium saucepan, combine the raspberries, sugar, lemon juice, and a pinch of salt. Stir to combine, then place the pan over medium heat.
3- Bring the mixture to a gentle simmer, stirring occasionally, and cook for about 20-25 minutes, or until the jam has thickened to your desired consistency. Be sure to keep a close eye on it, as the jam can go from perfectly thickened to overly reduced in a matter of minutes.
4- Once the jam has reached the perfect thickness, remove the pan from the heat and let it cool for a few minutes. You’ll know it’s ready when the jam coats the back of a spoon without dripping off.
5- Using a ladle, carefully transfer the hot raspberry jam into your clean, sterilized jars or containers, leaving about 1/4 inch of headspace at the top.
6- Seal the jars and let the jam cool completely before refrigerating. Your homemade raspberry jam is now ready to be enjoyed!
Pro Tips for Success
– For the best flavor, use the ripest, most flavorful raspberries you can find. Farmer’s markets and local berry farms are great sources for the freshest, most delicious berries.
– Avoid overcrowding the pan when cooking the jam – this can lead to uneven cooking and a less consistent texture.
– Be patient and let the jam simmer gently, stirring occasionally, to allow the natural pectin to work its magic and thicken the jam properly.
– Use a wooden spoon or spatula to stir the jam, as metal utensils can sometimes react with the fruit and affect the flavor.
– Keep a close eye on the jam towards the end of the cooking time to prevent it from boiling over or becoming too thick.
Serving and Storing Your Raspberry Jam Recipe
Perfect Pairings for Raspberry Jam Recipe
The versatility of this raspberry jam recipe is one of its greatest strengths. Whether you’re serving it as a topping for fluffy pancakes or waffles, spreading it on freshly baked bread, or using it as a filling for delicate pastries, the bright, fruity flavor of this jam is sure to delight.
For a classic breakfast or brunch pairing, try serving the raspberry jam alongside warm, buttery croissants or scones. The sweet-tart notes of the jam are the perfect complement to the rich, flaky pastries. You can also use it as a filling for homemade thumbprint cookies or as a topping for creamy cheesecake for a truly indulgent dessert.
And let’s not forget the simple pleasure of a heaping spoonful of raspberry jam on a slice of toast or a freshly baked biscuit. It’s a quick and satisfying snack that’s sure to bring a smile to your face.
Storage and Make-Ahead Tips
One of the best things about this raspberry jam recipe is that it keeps beautifully in the refrigerator for up to 2 weeks. Simply transfer the cooled jam to clean, sterilized jars or airtight containers and store them in the fridge. The jam will maintain its vibrant color and fresh flavor, making it easy to enjoy throughout the week.
If you’d like to extend the shelf life of your homemade raspberry jam, you can also try canning it for long-term storage. This process involves processing the jars in a water bath canner, which helps to create an airtight seal and prevents the growth of mold and bacteria. Properly canned raspberry jam can be stored in a cool, dark place for up to 1 year.
For a quick and easy make-ahead option, you can also freeze your raspberry jam. Simply transfer the cooled jam to freezer-safe containers or bags, leaving a bit of headspace to allow for expansion. The jam will keep in the freezer for up to 6 months, and you can thaw it in the refrigerator when you’re ready to use it.
Variations and Dietary Adaptations for Raspberry Jam Recipe
Creative Raspberry Jam Recipe Variations
While this classic raspberry jam recipe is a true delight as-is, there are plenty of ways to put your own spin on it. For a slightly tart twist, try adding a splash of balsamic vinegar or a teaspoon of fresh rosemary to the mix. You can also experiment with different sweeteners, such as honey or maple syrup, to create unique flavor profiles.
If you’re feeling adventurous, you can even combine the raspberries with other berries, like blackberries or blueberries, for a truly vibrant and complex jam. The possibilities are endless, so don’t be afraid to get creative and make this recipe your own!
Making Raspberry Jam Recipe Diet-Friendly
For those following a special diet or looking to reduce their sugar intake, this raspberry jam recipe can be easily adapted to suit your needs. To make a low-sugar version, simply reduce the amount of granulated sugar by half and use a sugar substitute, such as erythritol or stevia, to achieve the desired sweetness.
If you’re following a gluten-free diet, this raspberry jam is naturally gluten-free, making it a perfect topping for your favorite gluten-free breads, muffins, and pastries. And for our vegan friends, you can easily swap out the regular sugar for a plant-based alternative, like coconut sugar or maple syrup, for a delicious, dairy-free jam.
No matter your dietary preferences, this versatile raspberry jam recipe can be tailored to fit your needs, allowing you to enjoy the sweet, fruity goodness without compromising your health goals.
Frequently Asked Questions
Q: Can I use frozen raspberries instead of fresh?
A: Absolutely! Frozen raspberries work beautifully in this recipe. Just be sure to thaw them completely before using, and adjust the cooking time as needed to account for the additional moisture.
Q: How long does the raspberry jam need to cook?
A: The jam should simmer for 20-25 minutes, or until it has thickened to your desired consistency. Keep a close eye on it and stir occasionally to prevent burning or overcooking.
Q: Can I store the raspberry jam at room temperature?
A: For best quality and food safety, it’s recommended to store the raspberry jam in the refrigerator. Properly sealed jars can keep for up to 2 weeks in the fridge. If you’d like to store it for longer, you can process the jars in a water bath canner for shelf-stable storage.
Q: How much raspberry jam does this recipe yield?
A: This recipe will make approximately 2 cups of raspberry jam, depending on the juiciness of the berries and the final consistency. The yield may vary slightly, but it should be enough to fill 2-3 standard-sized jars.
Q: What if my raspberry jam doesn’t thicken properly?
A: If your jam doesn’t seem to be thickening up as much as you’d like, try simmering it for a bit longer, or try adding a small amount of powdered pectin to help it set. You can also try mashing a few of the berries with a potato masher to release more natural pectin.
Conclusion
There’s nothing quite like the sweet, tart flavor of homemade raspberry jam, and this recipe is truly a labor of love. From the moment you take that first bite, you’ll be transported back to your own childhood memories, or maybe even creating new ones with your loved ones.
So, what are you waiting for? Gather your ingredients, dust off your saucepan, and let’s get jamming! This raspberry jam recipe is sure to become a staple in your household, whether you’re spreading it on freshly baked bread, dolloping it onto your morning pancakes, or enjoying it straight from the jar with a spoon. The possibilities are endless, and the joy it brings is unmatched.
I can’t wait to hear about your experience with this recipe and how it’s become a new family favorite. Be sure to share your photos and thoughts in the comments below – I’d love to hear from you!