

I’ll never forget the first time I tasted my Aunt Mabel’s legendary Pink Velvet Cake. It was my cousin’s birthday party, and as soon as I sunk my fork into that luscious, velvety crumb, I was completely smitten. The vibrant pink hue was so eye-catching, and the flavor was an exquisite balance of sweet and tangy. From that moment on, I was hooked – Pink Velvet Cake became my new obsession. Whenever there was a family gathering, I’d eagerly await Aunt Mabel’s arrival, hoping she’d brought her famous recipe. And oh, the joy I felt when she’d pass me a thick slice, topped with the silkiest cream cheese frosting. To this day, that flavor combination takes me right back to those carefree childhood memories.
Why This Pink Velvet Cake Recipe Will Become Your Go-To
What makes this Pink Velvet Cake recipe so special is the use of a secret ingredient – buttermilk. While traditional red velvet cake relies on cocoa powder to achieve its signature crimson hue, this vibrant pink version gets its color and tantalizing flavor from the buttermilk. The acidity in the buttermilk reacts with the baking soda to create a soft, tender crumb that practically melts in your mouth. And the best part? This recipe is foolproof – even novice bakers can whip up a bakery-worthy Pink Velvet Cake with just a few simple steps.
The Secret Behind Perfect Pink Velvet Cake
The key to nailing the perfect Pink Velvet Cake texture is all in the mixing method. Rather than creaming the butter and sugar together, this recipe calls for a reverse creaming technique. By mixing the dry ingredients first, then slowly incorporating the wet ingredients, you end up with a cake that’s remarkably light and airy. And the addition of a touch of vinegar helps enhance the natural tanginess of the buttermilk, balancing out the sweetness for a delightful flavor profile.
Essential Ingredients You’ll Need
- Buttermilk – This provides the signature tang and helps create the soft, velvety crumb.
- All-purpose flour – The foundation for the cake’s structure.
- Granulated sugar – Sweetens the batter and tenderizes the crumb.
- Unsalted butter – Adds richness and a lovely mouthfeel.
- Eggs – Bind the ingredients together and contribute to the cake’s rise.
- Baking soda – Reacts with the buttermilk to produce a light, airy texture.
- Vinegar – Enhances the tanginess and helps achieve that vibrant pink hue.
- Red food coloring (optional) – For an even brighter pink color.
Step-by-Step Pink Velvet Cake Instructions
Preparing Your Pink Velvet Cake
This Pink Velvet Cake recipe is a true labor of love, but the end result is so worth it. With just a few simple ingredients and some attention to technique, you can create a stunning showstopper that’s sure to impress. The total prep and baking time is about 1 hour, and you’ll need a few essential tools like a stand mixer, cake pans, and a offset spatula.
1- Preheat your oven to 350°F (175°C) and grease and flour two 9-inch round cake pans.
2- In a large bowl, whisk together the all-purpose flour, granulated sugar, baking soda, and a pinch of salt until well combined.
3- In a separate bowl, beat the eggs and buttermilk together until fully incorporated. Then, slowly pour in the melted butter and vinegar, stirring constantly.
4- Gradually add the wet ingredients to the dry ingredients, mixing on low speed until just combined. Be careful not to overmix, as this can result in a tough, dense crumb.
5- If you want an even brighter pink hue, stir in a few drops of red food coloring and mix until the desired color is achieved.
6- Divide the batter evenly between the prepared cake pans and bake for 25-30 minutes, or until a toothpick inserted in the center comes out clean.
Pro Tips for Success
When it comes to baking the perfect Pink Velvet Cake, there are a few key things to keep in mind:
- Make sure all your ingredients are at room temperature before you begin. This helps them incorporate more easily.
- Don’t overmix the batter – this can lead to a tough, dry cake. Mix just until the ingredients are combined.
- Be patient when it comes to cooling the cakes. Letting them cool completely on a wire rack before frosting ensures a smooth, even finish.
- Use a serrated knife to level the cakes if needed, and be sure to frost between the layers and on the top and sides for maximum wow factor.
Serving and Storing Your Pink Velvet Cake
Perfect Pairings for Pink Velvet Cake
This decadent Pink Velvet Cake is the star of the show, but it also pairs beautifully with a variety of complementary flavors. For a classic pairing, top it with a silky cream cheese frosting and a light dusting of powdered sugar. Or, for a fun twist, try swirling in a spoonful of lemon curd or raspberry preserves between the layers. And don’t forget the beverage – a tall glass of ice-cold milk or a rich, frothy cappuccino are both perfect companions.
Storage and Make-Ahead Tips
Fortunately, this Pink Velvet Cake is easy to store and can even be made in advance. Once the cake is completely cooled, wrap each layer tightly in plastic wrap and refrigerate for up to 5 days. When you’re ready to serve, simply remove the layers, frost, and let it come to room temperature before slicing.
For longer storage, you can also freeze the unfrosted cake layers for up to 3 months. Just be sure to thaw them in the refrigerator overnight before frosting and serving.
Variations and Dietary Adaptations for Pink Velvet Cake
Creative Pink Velvet Cake Variations
While this classic Pink Velvet Cake recipe is a showstopper on its own, there are plenty of ways to put your own spin on it. Try swapping in different extract flavors, like almond or raspberry, for a subtle twist. Or, for a seasonal spin, fold in fresh berries or citrus zest. You could even turn it into a stunning layer cake by doubling the recipe and adding a creamy filling between the layers.
Making Pink Velvet Cake Diet-Friendly
Craving a healthier version of this indulgent treat? No problem! This Pink Velvet Cake can be easily adapted to suit a variety of dietary needs. For a gluten-free option, simply swap in your favorite gluten-free flour blend. And to make it vegan, use plant-based milk in place of the buttermilk and dairy-free butter or oil instead of the regular butter. You can even reduce the sugar and use a sugar-free sweetener for a low-carb take on this classic dessert.
Frequently Asked Questions
Q: Can I use regular milk instead of buttermilk in this recipe?
A: While you can substitute regular milk for the buttermilk, it won’t provide the same tangy flavor and tender texture. The acidity in the buttermilk is essential for reacting with the baking soda to create the iconic Pink Velvet Cake crumb. If you don’t have buttermilk on hand, you can make a quick substitute by mixing 1 cup of regular milk with 1 tablespoon of lemon juice or white vinegar.
Q: How long does the Pink Velvet Cake need to bake?
A: This recipe calls for baking the cake layers for 25-30 minutes at 350°F (175°C). Be sure to keep a close eye on them, as oven temperatures can vary. The cakes are done when a toothpick inserted in the center comes out clean.
Q: Can I make the Pink Velvet Cake in advance?
A: Absolutely! This cake actually benefits from being made a day or two in advance. Once the layers have cooled completely, wrap them tightly in plastic wrap and refrigerate for up to 5 days. When you’re ready to serve, simply frost the cake and let it come to room temperature before slicing.
Q: What’s the best way to frost a Pink Velvet Cake?
A: For the smoothest, most professional-looking frosting, I recommend using an offset spatula to spread the cream cheese frosting evenly over the top and sides of the cake. Start by adding a generous dollop of frosting to the top of the first layer, then use the spatula to gently smooth it out to the edges. Repeat with the second layer, then finish by frosting the sides for a clean, polished look.
Pink Velvet Cake
- Total Time: 45
- Yield: 12 servings
Description
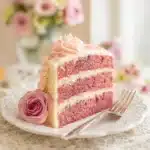
Indulge in the soft, moist, and vibrantly pink layers of this decadent Pink Velvet Cake. This easy-to-make recipe is sure to delight your taste buds and impress your guests.
Ingredients
– 2 cups all-purpose flour
– 2 cups granulated sugar
– 1/2 cup unsweetened cocoa powder
– 1 teaspoon baking soda
– 1/2 teaspoon salt
– 1 cup buttermilk
– 1/2 cup vegetable oil
– 2 large eggs
– 1 teaspoon vanilla extract
– 1 teaspoon red food coloring (or more to achieve desired color)
Instructions
1. – Preheat your oven to 350°F (175°C). Grease and flour two 9-inch round cake pans.
2. – In a large bowl, whisk together the flour, sugar, cocoa powder, baking soda, and salt.
3. – In a separate bowl, combine the buttermilk, vegetable oil, eggs, and vanilla extract. Mix well.
4. – Gradually add the wet ingredients to the dry ingredients, mixing until just combined. Be careful not to overmix.
5. – Add the red food coloring and gently fold it into the batter until the desired pink color is achieved.
6. – Divide the batter evenly between the prepared cake pans.
7. – Bake for 25-30 minutes, or until a toothpick inserted into the center comes out clean.
8. – Allow the cakes to cool in the pans for 10 minutes, then transfer them to a wire rack to cool completely.
9. – Once cooled, frost the cake as desired and enjoy!
Notes
For a deeper pink color, you can add more food coloring to the batter. Be sure to use a neutral-tasting oil, such as vegetable or canola oil, to avoid altering the flavor.
- Prep Time: 15
- Cook Time: 30
- Category: Dessert
- Method: Baking
- Cuisine: American
Conclusion
There’s no doubt about it – this Pink Velvet Cake recipe is an absolute showstopper. With its vibrant hue, velvety crumb, and irresistible flavor, it’s sure to become a new family favorite. The secret ingredient of buttermilk is the key to its unparalleled texture, and the simple, foolproof instructions make it accessible for bakers of all levels.
So what are you waiting for? Gather your ingredients, preheat your oven, and get ready to whip up a Pink Velvet Cake that will have your loved ones begging for the recipe. Don’t forget to share your creations with me – I can’t wait to see how your Pink Velvet Cake turns out!