
The day I made my first batch of Glacier Blue Velvet Cake Pops, it was like magic unfolding in my kitchen. I can still remember the look of pure delight on my friends’ faces as they took that first bite – the moist, velvety cake, the rich cream cheese frosting, and that stunning blue hue that seemed to just glow from within. It was a flavor explosion that had them reaching for seconds (and thirds!). From that moment on, I knew I had found a recipe that was destined to become a new favorite.
Why This Glacier Blue Velvet Cake Pops Recipe Will Become Your Go-To
The secret behind these perfect Glacier Blue Velvet Cake Pops lies in the unique combination of premium ingredients and a few clever techniques that take them to the next level. Trust me, once you try this recipe, you’ll be hooked – it’s that good.
The Secret Behind Perfect Glacier Blue Velvet Cake Pops
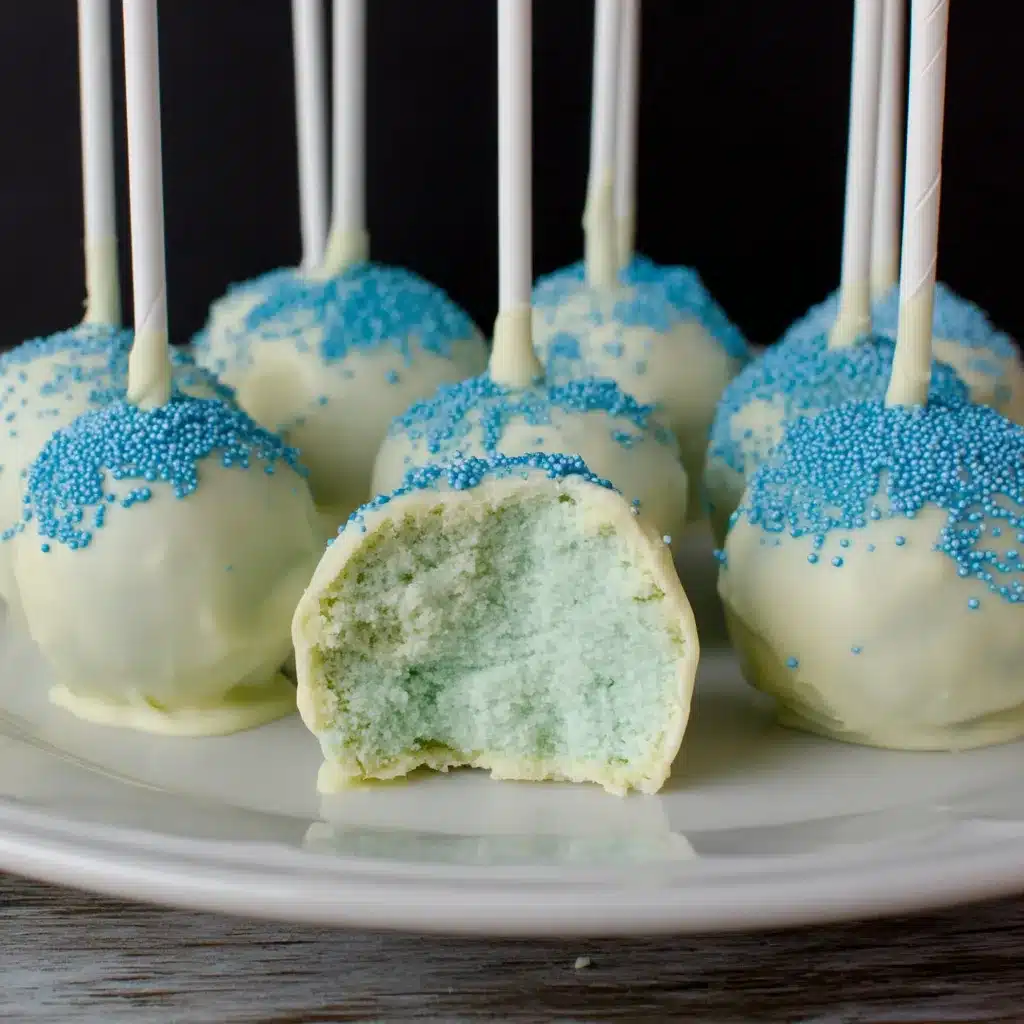
What sets these Glacier Blue Velvet Cake Pops apart is the way the velvety soft cake and creamy frosting meld together in each bite. The key is using a high-quality cream cheese and carefully folding it into the cake batter to create a perfectly smooth and rich texture. And of course, that stunning blue color comes from natural food coloring, giving these pops a mesmerizing visual appeal that’s sure to wow your guests.
Essential Ingredients You’ll Need
- Cake flour – This finer grind creates the ultra-soft, velvety crumb you want in a blue velvet cake.
- Cocoa powder – Just a touch adds depth of flavor and that signature velvet hue.
- Buttermilk – This reacts with the baking soda to make the cake extra tender and moist.
- Cream cheese – The secret to that luscious frosting that perfectly complements the cake.
- Gel food coloring – Look for a high-quality blue shade to achieve that eye-catching glacier blue color.
Step-by-Step Glacier Blue Velvet Cake Pops Instructions
Preparing Your Glacier Blue Velvet Cake Pops
Ready to dive in? This Glacier Blue Velvet Cake Pops recipe is surprisingly simple, with just a few easy steps from start to finish. You’ll need about 2 hours total, including baking the cake, assembling the pops, and dipping them in the chocolate coating. Let’s get started!
1- Preheat your oven to 350°F and grease a 9×13 inch baking pan. In a large bowl, whisk together the cake flour, cocoa powder, baking soda, and salt.
2- In a separate bowl, cream the butter and sugar until light and fluffy. Beat in the eggs one at a time, then stir in the vanilla and food coloring until fully incorporated.
3- Alternate adding the dry ingredients and buttermilk to the wet ingredients, mixing just until combined after each addition. Be careful not to overmix.
4- Pour the batter into your prepared pan and bake for 25-30 minutes, until a toothpick inserted in the center comes out clean. Allow the cake to cool completely.
5- In a large bowl, beat the cream cheese until smooth and creamy. Fold in the powdered sugar until well combined.
6- Crumble the cooled cake into the cream cheese frosting and mix until a thick, uniform batter forms. Scoop the mixture by the tablespoon and roll into smooth balls, placing them on a parchment-lined baking sheet.
Pro Tips for Success
The key to perfect Glacier Blue Velvet Cake Pops is all in the execution. Here are a few pro tips to ensure yours turn out amazing:
- For an ultra-smooth texture, sift the cake flour before measuring.
- Don’t skimp on the food coloring – you want that vibrant blue hue to really shine.
- Chill the cake pops for at least 30 minutes before dipping to help them hold their shape.
- Melt the chocolate coating over low heat to prevent it from seizing up.
- Use a toothpick or lollipop stick to dip and twirl the pops for an even, drip-free coating.
Serving and Storing Your Glacier Blue Velvet Cake Pops
Perfect Pairings for Glacier Blue Velvet Cake Pops
These Glacier Blue Velvet Cake Pops make a fantastic dessert or party treat. I love serving them alongside a steaming cup of hot chocolate or coffee for an indulgent pairing. They’re also a hit at baby showers, bridal luncheons, and holiday gatherings. The vibrant blue color and bite-sized portions make them simply irresistible.
Storage and Make-Ahead Tips
The great news is that Glacier Blue Velvet Cake Pops hold up beautifully. Once the chocolate coating has set, you can store them in an airtight container in the fridge for up to 5 days. They also freeze exceptionally well for up to 3 months – just thaw in the fridge overnight before serving.
Variations and Dietary Adaptations for Glacier Blue Velvet Cake Pops
Creative Glacier Blue Velvet Cake Pops Variations
If you’re feeling adventurous, there are so many ways to put a twist on these Glacier Blue Velvet Cake Pops. Try swirling in a ribbon of creamy white chocolate, rolling them in toasted coconut or crushed candy canes, or even coating them in a mirror-like glaze. You could also experiment with different flavors like mint, raspberry, or even a touch of espresso.
Making Glacier Blue Velvet Cake Pops Diet-Friendly
Looking to make these Glacier Blue Velvet Cake Pops a bit lighter? You can easily swap out the all-purpose flour for a gluten-free blend, use a plant-based cream cheese alternative, and opt for a low-calorie sweetener in the frosting. For a vegan version, simply replace the eggs with aquafaba (the liquid from a can of chickpeas) and use dairy-free chocolate chips or carob for the coating.
Frequently Asked Questions
Q: Can I use regular food coloring instead of gel?
A: While regular liquid food coloring will work, I highly recommend using a high-quality gel coloring. The gel provides a much more vivid and consistent blue hue that won’t affect the texture of the cake.
Q: How do I store leftover Glacier Blue Velvet Cake Pops?
A: Properly stored, these cake pops will keep in the fridge for up to 5 days. Just place them in an airtight container with a layer of parchment paper between each row. You can also freeze them for up to 3 months.
Q: Can I make the cake pops ahead of time?
A: Absolutely! The cake can be baked and crumbled up to 3 days in advance. Store it in an airtight container at room temperature until you’re ready to assemble the pops. The assembled and coated pops also freeze beautifully.
Q: How many cake pops does this recipe make?
A: This recipe will yield approximately 24-30 Glacier Blue Velvet Cake Pops, depending on the size you roll them. Feel free to adjust the portions to suit your needs.
Q: Help! My cake pops are crumbling when I try to dip them. What am I doing wrong?
A: If your cake pops are falling apart, it’s likely that the cake-to-frosting ratio is off. Try adding a bit more cream cheese frosting to the crumbled cake until you achieve a thick, malleable consistency that holds its shape when rolled into balls.

Glacier Blue Velvet Cake Pops
- Total Time: 60
- Yield: 24
Description
Indulge in the ultimate Glacier Blue Velvet Cake Pops – a decadent and easy-to-make dessert that’s perfect for any occasion. With a rich, velvety texture and a stunning blue hue, these cake pops are sure to be a hit with your family and friends.
Ingredients
– 1 box blue velvet cake mix
– 1/2 cup vegetable oil
– 3 large eggs
– 1 cup water
– 1/2 cup cream cheese, softened
– 2 cups powdered sugar
– 1 teaspoon vanilla extract
– Blue food coloring (gel or liquid)
– White chocolate or candy melts, for coating
Instructions
1. 1. Preheat your oven to 350°F (175°C) and grease a 9×13-inch baking pan.
2. 2. In a large bowl, combine the blue velvet cake mix, vegetable oil, eggs, and water. Mix until well blended.
3. 3. Pour the batter into the prepared baking pan and bake for 30-35 minutes, or until a toothpick inserted in the center comes out clean.
4. 4. Allow the cake to cool completely, then crumble it into a large bowl.
5. 5. In a separate bowl, beat the cream cheese until smooth. Add the powdered sugar and vanilla extract, and mix until well combined.
6. 6. Add the cream cheese mixture to the crumbled cake and mix until a dough-like consistency forms. Add a few drops of blue food coloring and mix until the desired color is achieved.
7. 7. Roll the cake mixture into small, uniform balls and place them on a baking sheet or parchment paper-lined tray.
8. 8. Melt the white chocolate or candy melts according to the package instructions. Dip the cake pops into the melted coating, allowing any excess to drip off.
9. 9. Place the coated cake pops back on the baking sheet or tray and allow them to set completely, about 30 minutes.
Notes
For a more vibrant blue color, use a gel or liquid food coloring instead of liquid. You can also experiment with different candy coatings, such as dark chocolate or colored candy melts, to create unique variations. Store the Glacier Blue Velvet Cake Pops in an airtight container at room temperature for up to 5 days.
- Prep Time: 30
- Cook Time: 30
- Category: Snacks & Desserts
- Method: Baking
- Cuisine: American
Conclusion
Get ready to wow your family and friends with these stunning Glacier Blue Velvet Cake Pops! The combination of the rich, velvety cake and creamy frosting is truly out of this world. Plus, that vibrant blue color is sure to make them the talk of any gathering. I can’t wait for you to try this recipe and experience the magic for yourself. Be sure to let me know how they turn out – I love hearing your feedback!