
It was the Christmas season and the air was filled with the scent of freshly baked cookies and the twinkling of lights. I can still remember the excitement I felt as a child when my grandma would make her famous Christmas Butterfinger Balls. The way the crispy candy shell would crack open to reveal the smooth, creamy peanut butter center – it was like a little taste of heaven in every bite.
I’d watch in awe as Grandma expertly rolled the balls between her palms, coating them in a delightful dusting of powdered sugar. And the best part? Getting to lick the spoon and bowl clean after she was done. Those Christmas Butterfinger Balls were the highlight of our holiday celebrations, a tradition that brought our family together year after year.
Why This Christmas Butterfinger Balls Recipe Will Become Your Go-To
Now, as an adult, I’ve perfected Grandma’s original recipe and I’m excited to share it with you. These Christmas Butterfinger Balls are not your average holiday treat – they’re a true showstopper that will have your guests coming back for more. The key is in the perfect balance of salty and sweet, with a texture that’s out of this world.
The Secret Behind Perfect Christmas Butterfinger Balls
What sets this recipe apart is the use of crushed Butterfinger candy bars, which add an extra layer of peanut butter flavor and delightful crunch. Plus, the addition of a touch of cinnamon and a pinch of sea salt elevates the overall taste, making these Christmas Butterfinger Balls truly irresistible.
Essential Ingredients You’ll Need
- Creamy peanut butter: The foundation of these tasty treats, providing a rich, smooth texture.
- Powdered sugar: This helps to create the perfect, melt-in-your-mouth consistency.
- Crushed Butterfinger candy bars: The star ingredient, adding that signature crunch and peanut butter flavor.
- Cinnamon: A subtle spice that complements the peanut butter beautifully.
- Sea salt: Just a pinch to balance the sweetness and bring out all the flavors.
Step-by-Step Christmas Butterfinger Balls Instructions
Preparing Your Christmas Butterfinger Balls
Get ready to create a batch of these Christmas Butterfinger Balls that will have everyone raving. The whole process takes about 30 minutes from start to finish, and all you’ll need is a mixing bowl, a spoon, and a baking sheet lined with parchment paper.
1- In a large mixing bowl, combine the creamy peanut butter and powdered sugar until the mixture is smooth and well-incorporated.
2- Stir in the crushed Butterfinger candy bars, making sure they are evenly distributed throughout the peanut butter mixture.
3- Gently roll the mixture into 1-inch balls and place them on the prepared baking sheet.
4- Once all the balls are formed, lightly dust them with a sprinkle of powdered sugar, using your fingers to ensure an even coating.
5- Finish the Christmas Butterfinger Balls by adding a pinch of sea salt to the top of each one.
6- Refrigerate the balls for at least 30 minutes before serving to allow them to firm up.
Pro Tips for Success
To ensure your Christmas Butterfinger Balls turn out perfectly, here are a few pro tips:
- Be sure to use creamy peanut butter, as crunchy peanut butter can make the texture a bit uneven.
- Crush the Butterfinger candy bars into small pieces, but don’t over-process them – you want to retain some texture.
- Don’t skimp on the powdered sugar – it’s essential for achieving that melt-in-your-mouth consistency.
- Refrigerating the balls before serving is a must, as it helps them hold their shape and prevents them from becoming too soft.
Serving and Storing Your Christmas Butterfinger Balls
Perfect Pairings for Christmas Butterfinger Balls
These Christmas Butterfinger Balls are the ultimate holiday indulgence, and they pair perfectly with a hot cup of coffee or a cold glass of milk. They also make a great addition to any holiday dessert spread, complementing other festive treats like gingerbread cookies and peppermint bark.
Storage and Make-Ahead Tips
The best part about these Christmas Butterfinger Balls is that they can be made in advance and stored for up to 2 weeks. Simply place them in an airtight container and refrigerate. When you’re ready to serve, just take them out and let them come to room temperature – they’ll be just as fresh and delicious as the day you made them.
Variations and Dietary Adaptations for Christmas Butterfinger Balls
Creative Christmas Butterfinger Balls Variations
While the classic Christmas Butterfinger Balls are already a crowd-pleaser, you can get creative with different variations. Try substituting other crushed candy bars, like Snickers or Reese’s Peanut Butter Cups, for a twist on the flavor. You can also experiment with adding a drizzle of melted chocolate or a sprinkle of chopped nuts on top.
Making Christmas Butterfinger Balls Diet-Friendly
For those with dietary restrictions, you can easily adapt this recipe to be gluten-free, vegan, or low-carb. Simply swap out the regular peanut butter for a nut butter of your choice, use a sugar-free powdered sweetener, and substitute the Butterfinger candy bars with a dairy-free, gluten-free alternative.
Frequently Asked Questions
Q: Can I use crunchy peanut butter instead of creamy?
A: While you can use crunchy peanut butter, the texture of the Christmas Butterfinger Balls may not be as smooth and creamy. Creamy peanut butter is the best choice for this recipe.
Q: How long do I need to chill the balls before serving?
A: It’s recommended to chill the Christmas Butterfinger Balls for at least 30 minutes before serving. This helps them firm up and hold their shape.
Q: Can I make these Christmas Butterfinger Balls ahead of time?
A: Absolutely! These treats can be made up to 2 weeks in advance. Just store them in an airtight container in the refrigerator until you’re ready to serve.
Q: How many Christmas Butterfinger Balls does this recipe make?
A: This recipe yields approximately 24 to 30 Christmas Butterfinger Balls, depending on the size you roll them.
Q: What should I do if the balls are too soft?
A: If the Christmas Butterfinger Balls are too soft, try chilling them for a bit longer or adding a bit more powdered sugar to the mixture.

Christmas Butterfinger Balls
- Total Time: 45
- Yield: 24
Description
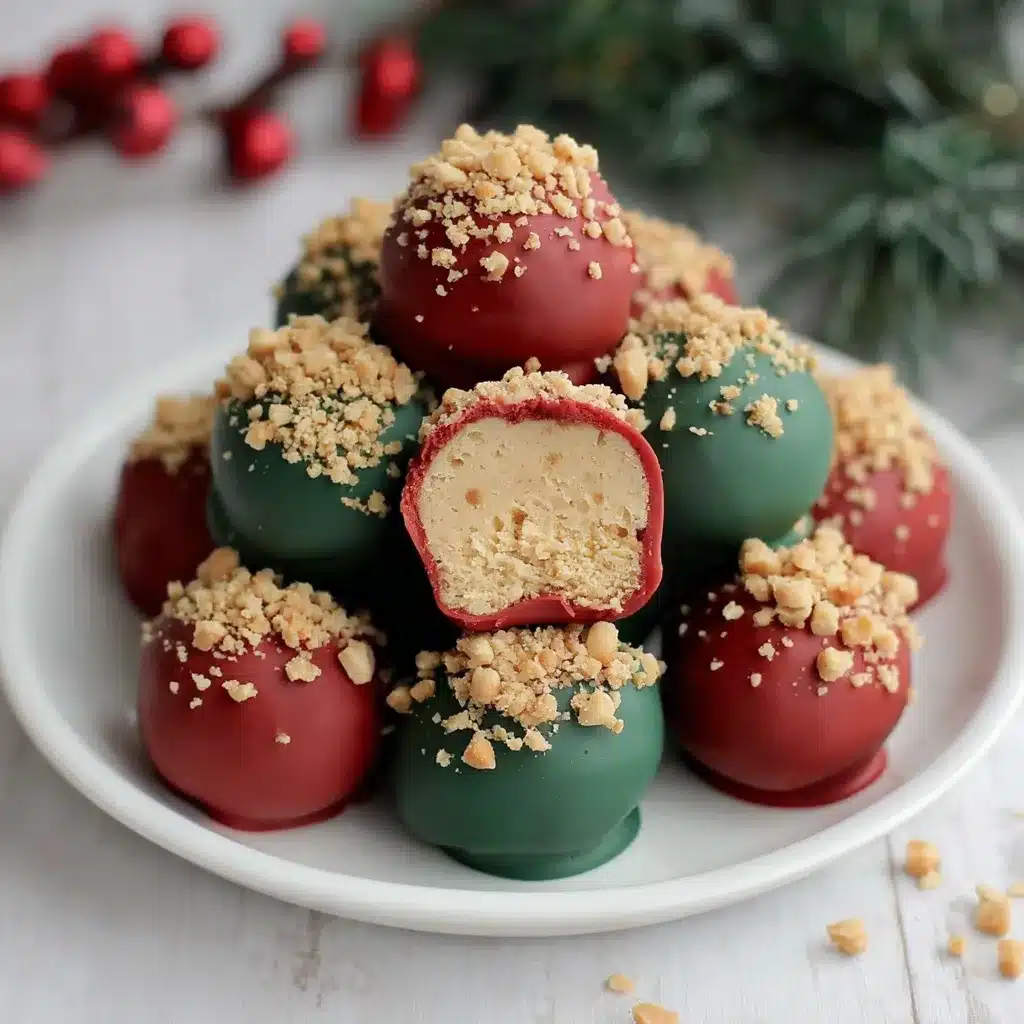
Indulge in the perfect Christmas treat with these easy-to-make, no-bake Christmas Butterfinger Balls! Packed with a rich peanut butter center and a crunchy Butterfinger coating, these festive bites are a holiday must-try.
Ingredients
– 1 cup smooth peanut butter
– 1 cup powdered sugar
– 2 cups crushed Butterfinger candy bars
– 1/4 cup powdered sugar, for dusting
Instructions
1. – In a large bowl, combine the peanut butter and 1 cup of powdered sugar until well blended.
2. – Fold in the crushed Butterfinger candy bars until evenly distributed.
3. – Using a small cookie scoop or spoon, form the mixture into 1-inch balls and place them on a parchment-lined baking sheet.
4. – Refrigerate the balls for at least 30 minutes to firm up.
5. – Once chilled, roll the balls in the remaining 1/4 cup of powdered sugar to coat.
6. – Serve and enjoy your delightful Christmas Butterfinger Balls!
Notes
Store the coated balls in an airtight container in the refrigerator for up to 1 week.
- Prep Time: 15
- Category: Snacks & Desserts
- Method: No-Bake
- Cuisine: American
Conclusion
These Christmas Butterfinger Balls are the ultimate holiday indulgence that will have your family and friends raving. With their perfect balance of salty and sweet, and that irresistible crunch from the Butterfinger candy bars, it’s no wonder they’ve become a beloved tradition in my family. I can’t wait for you to try this recipe and experience the magic of Christmas Butterfinger Balls for yourself. Happy holidays!