

I’ll never forget the first time I tasted my grandma’s famous cherry tart recipe. I was just a little kid, probably no more than 8 or 9 years old, and I remember it like it was yesterday. It was a sweltering summer day, and my family had all gathered at my grandparents’ house for one of our famous Sunday barbecues. As I ran around the backyard with my cousins, the mouthwatering aroma of Grandma’s cherry tart wafted through the air, drawing me into the kitchen like a moth to a flame.
When I finally got a glimpse of the tart, I was mesmerized. The deep red cherries peeked out from the golden, flaky crust, and a light dusting of powdered sugar made the whole thing sparkle. I could hardly contain my excitement as Grandma carefully sliced into it and placed a warm, gooey slice onto my plate.
The first bite was absolute perfection – the sweet-tart cherries mingled with the buttery, crumbly crust, and the vanilla custard filling was rich and creamy. I remember my eyes going wide as the flavors exploded in my mouth, and I immediately went back for seconds (and thirds!). From that day on, I was hooked on Grandma’s cherry tart recipe, and it became a cherished family tradition that we looked forward to every summer.
Why This Cherry Tart Recipe Will Become Your Go-To
Years have passed, but that memory of my grandma’s incredible cherry tart still brings a smile to my face. And you know what? I’m excited to share her secret recipe with you today. This cherry tart recipe is truly something special, and I’m confident it’ll become a new favorite in your household, too.
The Secret Behind Perfect cherry tart recipe
What makes this cherry tart recipe so exceptional? It all comes down to the perfect balance of flavors and textures. The buttery, flaky crust provides the perfect foundation, while the sweet-tart cherry filling and creamy vanilla custard work in perfect harmony. But the real secret? It’s all in the technique.
Print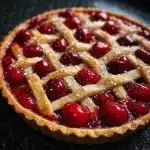
Cherry Tart Recipe
- Total Time: 60
- Yield: 8
Description
Indulge in the classic, comforting flavors of this homemade cherry tart recipe. With a buttery, flaky crust and a sweet, juicy filling, this dessert is sure to delight.
Ingredients
– 1 1/2 cups all-purpose flour
– 1/2 teaspoon salt
– 1/2 cup unsalted butter, chilled and cubed
– 3-4 tablespoons ice water
– 4 cups fresh or frozen pitted cherries
– 3/4 cup granulated sugar
– 2 tablespoons cornstarch
– 1 teaspoon vanilla extract
Instructions
1. 1. In a food processor, pulse the flour and salt. Add the chilled butter and pulse until the mixture resembles coarse crumbs. Add the ice water, 1 tablespoon at a time, and pulse until the dough just begins to hold together.
2. 2. Shape the dough into a disc, wrap in plastic wrap, and refrigerate for at least 30 minutes.
3. 3. Preheat the oven to 375°F (190°C).
4. 4. In a large bowl, toss the cherries with the sugar and cornstarch. Set aside.
5. 5. On a lightly floured surface, roll the dough out into a 12-inch circle. Transfer to a 9-inch tart pan with a removable bottom.
6. 6. Spoon the cherry mixture into the tart shell. Fold any overhanging dough over the filling, creating a rustic edge.
7. 7. Bake for 40-45 minutes, or until the crust is golden brown and the filling is bubbling.
8. 8. Allow the tart to cool completely before slicing and serving.
Notes
For a more decadent touch, serve the cherry tart with a scoop of vanilla ice cream or a dusting of powdered sugar.
- Prep Time: 20
- Cook Time: 40
- Category: Dessert
- Method: Baking
- Cuisine: American
You see, Grandma had a very specific way of preparing the crust and handling the cherries that ensures the tart comes out perfectly every time. And I’m going to let you in on those little tricks, so you can recreate that same magic in your own kitchen.
Essential Ingredients You’ll Need
To make this cherry tart recipe, you’ll need a few key ingredients:
Unsalted butter: The foundation of the flaky, tender crust.
All-purpose flour: For the crust, providing structure and a light, delicate texture.
Granulated sugar: To sweeten the filling and balance the tart cherries.
Eggs: Used in both the crust and the custard filling, adding richness and binding power.
Heavy cream: The secret to the silky-smooth custard.
Vanilla extract: Enhancing the flavors and adding a lovely aroma.
Fresh cherries: The star of the show, of course! Make sure to use ripe, juicy cherries for the best flavor.
Step-by-Step cherry tart recipe Instructions
Preparing Your cherry tart recipe
Making this cherry tart recipe is surprisingly simple, but it does require a bit of time and attention to detail. The total prep and baking time is around 2 hours, and you’ll need a few key pieces of equipment, like a food processor, a tart pan with a removable bottom, and a stand mixer or hand mixer.
1- Begin by making the crust. In a food processor, pulse together the flour, sugar, and a pinch of salt until well combined. Add the cold, cubed butter and pulse until the mixture resembles coarse crumbs. Slowly add in the ice water, a tablespoon at a time, until the dough just begins to come together. Gather the dough into a disc, wrap it in plastic, and refrigerate for at least 30 minutes.
2- While the dough is chilling, prepare the cherry filling. In a large bowl, combine the pitted and halved cherries, sugar, cornstarch, and a pinch of salt. Toss everything together until the cherries are evenly coated.
3- Once the dough has rested, roll it out on a lightly floured surface to a 12-inch circle, about 1/4-inch thick. Carefully transfer the dough to a 9-inch tart pan with a removable bottom, gently pressing it into the sides and trimming any excess.
4- Prick the bottom of the tart shell with a fork, then line it with parchment paper and fill it with pie weights or dried beans. Bake the tart shell for 20 minutes at 400°F, then remove the weights and paper and bake for an additional 10 minutes until lightly golden.
5- While the tart shell is baking, prepare the custard filling. In a medium saucepan, whisk together the eggs, sugar, and cornstarch until smooth. Gradually whisk in the heavy cream and vanilla extract. Cook the mixture over medium heat, stirring constantly, until it thickens and coats the back of a spoon, about 5-7 minutes.
6- Remove the partially baked tart shell from the oven and carefully spread the cherry filling into the bottom. Gently pour the vanilla custard over the cherries, smoothing the top. Return the tart to the oven and bake for an additional 25-30 minutes, until the custard is set and the crust is golden brown.
Pro Tips for Success
Here are a few expert tips to ensure your cherry tart recipe turns out perfectly every time:
– Be sure to chill the dough thoroughly before rolling it out – this helps prevent it from shrinking during baking.
– Use fresh, ripe cherries for the best flavor. Avoid canned or frozen cherries, as they can be too soft and watery.
– Don’t overfill the tart shell with the cherry mixture – you want just enough to create a nice, even layer.
– Keep a close eye on the tart during the final bake to prevent the crust from burning.
– Let the tart cool completely before slicing, to allow the custard to set up properly.
Serving and Storing Your cherry tart recipe
Perfect Pairings for cherry tart recipe
This cherry tart recipe is the perfect dessert for any occasion. It’s a wonderful way to celebrate the arrival of summer, and it pairs beautifully with a scoop of vanilla ice cream or a dollop of freshly whipped cream. For a more elegant presentation, you can serve it alongside a glass of sparkling wine or a cup of strong, aromatic coffee.
Storage and Make-Ahead Tips
Leftover cherry tart can be stored in the refrigerator for up to 4 days. Simply cover it with plastic wrap or foil to keep it fresh. You can also freeze the tart for up to 2 months – just be sure to wrap it tightly in plastic wrap and aluminum foil.
If you’d like to get a head start on your cherry tart, you can prepare the crust and filling components up to 2 days in advance. Store the chilled dough and cherry mixture separately in the fridge until you’re ready to assemble and bake the tart.
Variations and Dietary Adaptations for cherry tart recipe
Creative cherry tart recipe Variations
While this classic cherry tart recipe is a true delight, there are plenty of ways to put your own spin on it. For a seasonal twist, you could swap out the cherries for other fresh fruits, like peaches, plums, or blackberries. You could also try adding a touch of almond extract to the custard for a delightful flavor pairing.
For a bit of crunch, you could sprinkle some chopped nuts, like toasted almonds or pecans, over the top of the tart before baking. And if you’re feeling really adventurous, you could even experiment with a streusel topping or a drizzle of caramel sauce.
Making cherry tart recipe Diet-Friendly
If you’re looking to make this cherry tart recipe a bit more health-conscious, there are a few simple substitutions you can try. For a gluten-free version, you can use a gluten-free all-purpose flour blend in the crust. And for a vegan or dairy-free option, you can swap out the butter, cream, and eggs for plant-based alternatives, like vegan butter, coconut milk, and silken tofu.
Just keep in mind that these substitutions may slightly alter the texture and flavor of the final tart, so you may need to do a bit of experimenting to get the results you’re after.
Frequently Asked Questions
Q: Can I use frozen cherries instead of fresh?
A: While fresh cherries are ideal for this recipe, you can certainly use frozen cherries in a pinch. Just be sure to thaw them completely and pat them dry before using, as the extra moisture can make the filling watery.
Q: How can I tell when the custard is fully set?
A: The custard is ready when it coats the back of a spoon and doesn’t immediately run off. You can also give the tart a gentle shake – if the center still jiggles significantly, it needs a bit more time in the oven.
Q: Can I make this cherry tart recipe ahead of time?
A: Absolutely! The tart can be made up to 4 days in advance and stored in the refrigerator. You can also freeze the baked and cooled tart for up to 2 months. Just be sure to thaw it in the fridge before serving.
Q: How do I know if my cherries are ripe and ready to use?
A: Look for cherries that are plump, firm, and deeply colored. They should come off the stem easily with a gentle tug. Avoid any cherries that are shriveled, soft, or discolored.
Q: What can I do if my crust shrinks during baking?
A: If your tart crust starts to shrink during the blind baking process, try pressing the dough gently back into the pan with the back of a spoon or your fingers. You can also try chilling the dough for longer before rolling it out, or using a bit less water in the dough.
Conclusion
There you have it – my grandma’s legendary cherry tart recipe, passed down through the generations and now shared with you. I hope this recipe brings as much joy and deliciousness to your family as it has to mine over the years.
Don’t be intimidated by the seemingly complex steps – with a little care and attention to detail, you’ll be whipping up this showstopping dessert in no time. And once you take that first bite, I just know you’ll be hooked, just like I was all those years ago.
So what are you waiting for? Gather your ingredients, put on your apron, and get ready to create a little magic in your own kitchen. I can’t wait to hear how your cherry tart recipe turns out!