
Growing up, my grandma’s homemade canning salsa recipe was the stuff of legends. Every summer, our whole family would gather around her kitchen counter, eagerly watching as she expertly diced tomatoes, simmered the spices, and carefully packed the salsa into jars. The air would be thick with the aroma of roasted chiles and the sizzle of onions hitting the pan. It was a sensory experience I’ll never forget.
Grandma always made it look so effortless, but I now know the true magic of her canning salsa recipe came from years of perfecting the technique. She’d measure each ingredient with precision, adjust the seasoning just so, and ensure the pH balance was spot on for safe canning. Even as a kid, I was mesmerized by her process – how she could turn humble produce into something so vibrant, flavorful, and utterly addictive.
Of course, I begged her to teach me her canning salsa recipe secrets, but Grandma would just wink and say, “Some things are better left unsaid, darlin’.” It wasn’t until years later, when I started experimenting with canning salsa recipes of my own, that I truly appreciated the art of her craft. The balance of sweetness, acidity, and heat; the perfect texture that wasn’t too chunky or too thin; the way the flavors melded together into something greater than the sum of its parts – it all required skill and finesse.
So when I finally developed my own signature canning salsa recipe, you better believe I was excited to share it with the world. This is the recipe that will have your friends and family begging for more, the one that will make you the salsa-making legend in your own right. Are you ready to unlock the secrets of canning salsa recipe perfection?
Why This Canning Salsa Recipe Will Become Your Go-To
The beauty of this canning salsa recipe lies in its versatility and flavor profile. Unlike many store-bought salsas that can taste one-note or overly vinegary, this homemade version bursts with a harmonious blend of sweet, savory, and just the right amount of heat. The secret? It all comes down to the careful selection and balance of ingredients.
The Secret Behind Perfect canning salsa recipe
What sets this canning salsa recipe apart is the use of both fresh and roasted vegetables. By charring the tomatoes, onions, and chiles before simmering them down, you unlock a delightful depth of flavor that can’t be achieved with raw produce alone. The roasting process caramelizes the natural sugars, intensifying the sweetness and adding a subtle smokiness that complements the other seasonings perfectly.
But don’t worry, this canning salsa recipe isn’t all about the heat. I’ve carefully calibrated the spice level to be crowd-pleasing – enough to tantalize your taste buds, but not so much that it overpowers the other flavors. And the addition of fresh cilantro, lime juice, and a touch of brown sugar brings a vibrant freshness and just the right amount of acidity to balance it all out.
Essential Ingredients You’ll Need
Tomatoes: The foundation of any great salsa, I use a mix of juicy, ripe Roma tomatoes and tangy, flavorful heirloom varieties for maximum depth of flavor.
Onions: A combination of red onions and shallots adds sweetness, complexity, and a delightful crunch to the final salsa.
Chiles: For the perfect blend of heat and flavor, I reach for a mix of jalapeños and Anaheim chiles. You can adjust the ratio to suit your spice preference.
Garlic: Freshly minced garlic is a must for providing an aromatic backbone to the salsa.
Cilantro: No canning salsa recipe is complete without the fragrant, herbaceous flavor of fresh cilantro.
Lime Juice: A generous squeeze of lime juice brightens up the salsa and balances the other flavors.
Brown Sugar: Just a touch of brown sugar helps to round out the acidity and enhance the natural sweetness of the vegetables.
Spices: A blend of cumin, smoked paprika, and a pinch of cayenne pepper lend warmth, depth, and a subtle kick.
Step-by-Step canning salsa recipe Instructions
Preparing Your canning salsa recipe
This canning salsa recipe is a labor of love, but I promise the end result is well worth the effort. You’ll need about 90 minutes from start to finish, including the time it takes to roast the vegetables and simmer the salsa. Be sure to have all your ingredients prepped and ready to go before you begin, as the process moves fairly quickly once you start cooking.
1- First, preheat your oven to 400°F (200°C). Line a large baking sheet with parchment paper or a silicone mat. Arrange the halved tomatoes, onion wedges, and whole chiles on the prepared sheet. Drizzle with a bit of olive oil and season with a pinch of salt and pepper. Roast for 25-30 minutes, flipping halfway, until the vegetables are softened and slightly charred.
2- While the vegetables are roasting, prepare the remaining ingredients. Mince the garlic, chop the cilantro, and cut the lime in half.
3- Once the roasted vegetables are done, transfer them to a large pot or Dutch oven. Add the minced garlic, cumin, smoked paprika, and a pinch of cayenne. Stir to combine, then pour in the crushed tomatoes and lime juice. Bring the mixture to a simmer over medium heat and let it cook for 20-25 minutes, stirring occasionally, until the salsa has thickened to your desired consistency.
4- Carefully taste the salsa and adjust the seasoning as needed, adding more salt, pepper, or a touch of brown sugar to balance the flavors.
5- Remove the pot from the heat and stir in the chopped cilantro. Give the salsa a final taste and make any last tweaks.
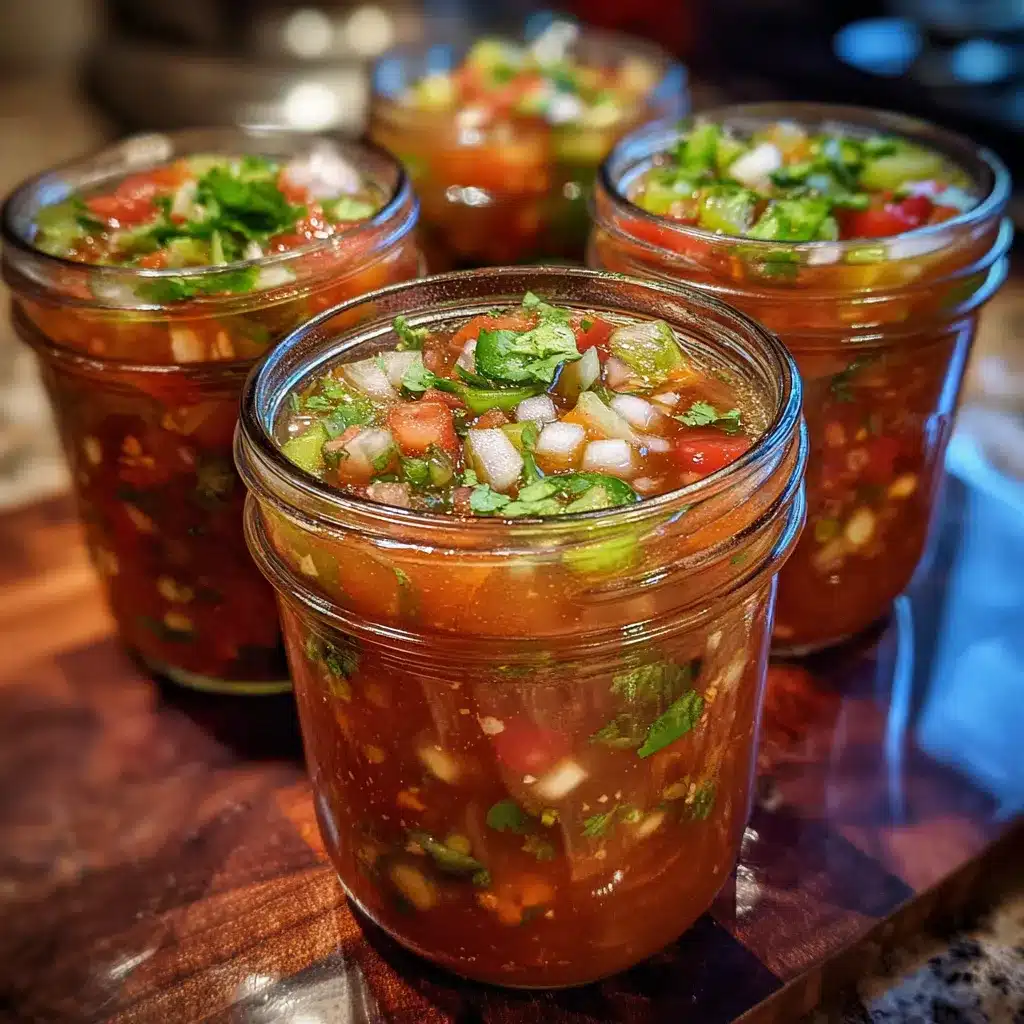
6- Ladle the hot salsa into sterilized jars, leaving about 1/2 inch of headspace. Seal the jars according to your preferred canning method, then let them cool completely before storing.
Pro Tips for Success
– Roast the vegetables at a high temperature to achieve maximum caramelization and flavor development.
– Adjust the ratio of chiles to control the heat level – more jalapeños for a spicier salsa, more Anaheims for a milder version.
– Let the salsa simmer for at least 20 minutes to allow the flavors to meld and the texture to thicken.
– Taste and adjust the seasoning as needed – the perfect balance of sweet, sour, and heat is key.
– Be sure to use the proper canning techniques to ensure your salsa is shelf-stable and safe to enjoy.
Serving and Storing Your canning salsa recipe
Perfect Pairings for canning salsa recipe
This canning salsa recipe is a versatile condiment that pairs beautifully with a wide variety of dishes. Serve it as a dip with crispy tortilla chips for the ultimate snack or appetizer. It also makes a fantastic topping for grilled chicken, fish, or steak, adding a burst of flavor to your main course.
For a complete Tex-Mex feast, try serving the salsa alongside Mexican rice, refried beans, and warm flour tortillas. Or get creative and use it as a base for breakfast burritos, stuffed avocados, or even as a topping for your morning eggs.
And don’t forget the drinks! This canning salsa recipe is the perfect companion to refreshing margaritas, Mexican beers, or even a pitcher of icy-cold sangria.
Storage and Make-Ahead Tips
One of the best things about this canning salsa recipe is that it’s incredibly easy to make in large batches and store for future use. Once the jars have cooled completely, you can keep them in a cool, dark place like a pantry or basement for up to 12 months.
If you’re not planning to can the salsa, you can also store it in an airtight container in the refrigerator for up to 1 week. The flavors will continue to meld and develop over time, making it even more delicious.
For a make-ahead option, you can prepare the salsa base (minus the cilantro) up to 3 days in advance and refrigerate it until you’re ready to can or serve. Just stir in the fresh cilantro right before canning or serving.
Variations and Dietary Adaptations for canning salsa recipe
Creative canning salsa recipe Variations
While this canning salsa recipe is pretty much perfect as-is, there’s always room for a little creativity. Try swapping out the Anaheim chiles for fiery habaneros or tangy tomatillos for a unique spin on the classic. You can also experiment with different herb combinations, like swapping the cilantro for fresh oregano or basil.
For a seasonal twist, consider incorporating roasted corn, diced avocado, or even chopped mango or pineapple. The possibilities are endless!
Making canning salsa recipe Diet-Friendly
This canning salsa recipe is already naturally gluten-free, but you can easily adapt it to suit other dietary needs as well. For a vegan or vegetarian version, simply omit the brown sugar or swap it for an equal amount of agave or maple syrup.
If you’re watching your carb intake, feel free to reduce the amount of brown sugar in the recipe or leave it out entirely. The salsa will still be delicious without it, as the natural sweetness from the roasted vegetables will shine through.
Frequently Asked Questions
Q: Can I use a different type of tomato in this canning salsa recipe?
A: Absolutely! While I recommend a mix of Roma and heirloom tomatoes for the best flavor and texture, you can use any variety of fresh, ripe tomatoes you have on hand. Just be sure to adjust the cooking time as needed, as some tomato varieties may have more or less moisture content.
Q: How can I adjust the spice level in this canning salsa recipe?
A: The key to controlling the heat is in the ratio of jalapeños to Anaheim chiles. For a milder salsa, use more Anaheims and fewer jalapeños. For a spicier version, increase the amount of jalapeños. You can also add a pinch of cayenne pepper to amp up the heat.
Q: Can I make this canning salsa recipe in advance?
A: Yes, this salsa is a great make-ahead option. You can prepare the salsa base (without the cilantro) up to 3 days in advance and store it in the refrigerator. When you’re ready to can or serve, simply stir in the fresh chopped cilantro.
Q: How many jars of salsa will this recipe yield?
A: This canning salsa recipe will fill approximately 6-8 standard 12-ounce jars, depending on how thick you like your salsa. If you prefer a chunkier texture, you may get a few less jars. Adjust the recipe proportions as needed to make more or less.
Q: What if my salsa is too thin or too thick?
A: If your salsa turns out too thin, simply let it simmer for a bit longer, stirring occasionally, to allow some of the excess moisture to evaporate. Conversely, if it’s too thick, you can thin it out by adding a splash of water or more lime juice. Taste and adjust the seasoning as needed.
Conclusion
Are you ready to become the salsa-making legend in your own right? This canning salsa recipe is the perfect blend of sweet, savory, and just the right amount of heat, and it’s sure to impress everyone who tries it.
The key is in the careful selection and balance of ingredients, as well as the technique of roasting the vegetables to unlock a depth of flavor that can’t be achieved any other way. With a little time and attention, you’ll have jars of this irresistible homemade salsa lining your pantry shelves, ready to brighten up any meal or snack.
So what are you waiting for? Gather your ingredients, fire up your oven, and get ready to master the art of canning salsa recipe perfection. I can’t wait to hear how it turns out for you!