

Growing up, I have so many fond memories of my grandma’s kitchen. The aroma of freshly baked bread and the tangy scent of her famous bread and butter pickle recipe would fill the air, instantly transporting me back to those cozy afternoons spent watching her work her magic. Grandma was the true master of this recipe, and it’s no wonder it’s become a family staple that we all crave.
There’s just something so comforting and nostalgic about that crisp, tangy crunch of her bread and butter pickles. I can still picture her carefully slicing the cucumbers, adding just the right amount of vinegar, sugar, and spices to create the perfect balance of flavors. She’d let the jars sit for what felt like an eternity, but the wait was always worth it. When we’d finally get to dig in, it was like a little taste of heaven.
Even now, as an adult, I find myself craving those flavors of my childhood. That’s why I’m excited to share Grandma’s tried-and-true bread and butter pickle recipe with you. This is the recipe that’s been passed down through generations, and it’s sure to become your new go-to for all your pickling needs.
Why This bread and butter pickle recipe Recipe Will Become Your Go-To
The Secret Behind Perfect bread and butter pickle recipe
What sets this bread and butter pickle recipe apart is the perfect balance of sweet and tangy flavors, combined with a satisfying crunch that you simply can’t find in store-bought pickles. Grandma’s secret was all in the technique – she’d carefully slice the cucumbers to the perfect thickness, ensuring they’d absorb the brine just right. And the blend of spices she used, from the warm cinnamon to the fragrant mustard seeds, created a depth of flavor that’s simply unmatched.
Print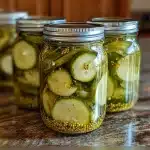
Bread and Butter Pickle Recipe: A Heavenly 30-Minute Delight
- Total Time: 30
- Yield: 8
- Diet: Vegetarian
Description
Elevate your meals with this easy, old-fashioned bread and butter pickle recipe. Bursting with tangy, sweet, and crisp flavors, these homemade pickles are a delightful addition to sandwiches, burgers, and more.
Ingredients
– 4 cups thinly sliced cucumbers
– 1 cup white vinegar
– 1/2 cup granulated sugar
– 1 teaspoon salt
– 1/2 teaspoon ground turmeric
– 1/2 teaspoon celery seed
– 1/4 teaspoon ground black pepper
Instructions
1. – In a large bowl, combine the sliced cucumbers.
2. – In a small saucepan, combine the vinegar, sugar, salt, turmeric, celery seed, and black pepper. Bring the mixture to a boil, stirring until the sugar is dissolved.
3. – Pour the hot brine over the cucumbers and stir to coat.
4. – Transfer the pickles to a clean, sterilized jar or container. Cover and refrigerate for at least 30 minutes before serving.
Notes
For best results, let the pickles chill in the refrigerator for 24-48 hours to allow the flavors to meld. These pickles will keep for up to 2 weeks in the refrigerator.
- Prep Time: 15
- Cook Time: 15
- Category: Breads & Beverages
- Method: Stovetop
- Cuisine: American
But the real magic happens in the fermentation process. Grandma would let the pickles sit for at least a week, allowing the flavors to meld and the texture to develop. This slow, patient approach is what gives these bread and butter pickles their signature crunch and tangy-sweet taste. It’s a labor of love, but trust me, the end result is more than worth it.
Essential Ingredients You’ll Need
– Cucumbers: The star of the show! Grandma always used a mix of pickling and English cucumbers for the perfect texture.
– White vinegar: This provides the tangy backbone of the brine.
– Granulated sugar: Just the right amount of sweetness to balance out the acidity.
– Kosher salt: Crucial for drawing out the moisture and creating that signature crunch.
– Cinnamon sticks: A warm, comforting spice that adds depth and complexity.
– Mustard seeds: These little seeds bring a subtle pop of flavor and visual interest.
– Garlic cloves: For a hint of pungent flavor that ties everything together.
Step-by-Step bread and butter pickle recipe Instructions
Preparing Your bread and butter pickle recipe
Making Grandma’s bread and butter pickles is a straightforward process, but it does require a bit of patience and attention to detail. The total time from start to finish is around 1 hour of active prep, plus at least 1 week of fermentation. You’ll need a few basic kitchen tools, like a sharp knife, a cutting board, and some sterilized mason jars.
1- Start by thoroughly washing and slicing the cucumbers into 1/4-inch rounds. Be sure to use a mix of pickling and English cucumbers for the best texture.
2- In a large saucepan, combine the vinegar, sugar, salt, cinnamon sticks, and mustard seeds. Bring the mixture to a boil, stirring occasionally, until the sugar and salt have completely dissolved.
3- Remove the brine from the heat and let it cool to room temperature. This step is crucial, as you don’t want to pour hot brine over the delicate cucumber slices.
4- Once the brine has cooled, layer the cucumber slices and garlic cloves in a sterilized mason jar, packing them in tightly. Pour the brine over the cucumbers, making sure they’re fully submerged.
5- Seal the jars and let them sit at room temperature for 7-10 days, giving them a gentle shake every couple of days. You’ll know the pickles are ready when they’ve developed a satisfying crunch and the brine has a slightly cloudy appearance.
6- Once the fermentation is complete, transfer the jars to the refrigerator. Your bread and butter pickles are now ready to enjoy!
Pro Tips for Success
– Use a mix of pickling and English cucumbers for the best texture. The pickling cukes will provide that classic crunch, while the English cukes will add a bit of softness.
– Be patient with the fermentation process. Resist the urge to crack open the jars too soon – the longer you let them sit, the better the flavor will be.
– Sterilize your jars and lids thoroughly to prevent any unwanted bacteria from spoiling your pickles.
– Adjust the amount of sugar or vinegar to your personal taste preferences. Some people like their bread and butter pickles a little sweeter, while others prefer more acidity.
– Keep an eye on the jars during fermentation, and skim off any scum or foam that may develop on the surface. This is normal, but you’ll want to remove it to maintain the quality of your pickles.
Serving and Storing Your bread and butter pickle recipe
Perfect Pairings for bread and butter pickle recipe
Grandma’s bread and butter pickles are the ultimate versatile condiment. They’re the perfect accompaniment to a juicy burger or a classic grilled cheese sandwich. The tangy-sweet flavor also pairs beautifully with cold cuts, cheese platters, and even as a topping for avocado toast.
If you’re looking to really showcase the pickles, try serving them alongside a simple green salad or as part of a traditional charcuterie board. And of course, they’re always a crowd-pleasing addition to any backyard barbecue or picnic spread.
### Storage and Make-Ahead Tips
One of the best things about this bread and butter pickle recipe is that it keeps incredibly well. Once the fermentation process is complete, you can store the jars in the refrigerator for up to 6 months. Just make sure to keep them submerged in the brine to maintain that perfect crunch.
If you want to get a head start on your pickling, you can easily make this recipe a week or two in advance. Simply let the jars ferment at room temperature for the full 7-10 days, then transfer them to the fridge. This way, you’ll have a steady supply of homemade bread and butter pickles on hand whenever the craving strikes.
Variations and Dietary Adaptations for bread and butter pickle recipe
Creative bread and butter pickle recipe Variations
While Grandma’s classic bread and butter pickle recipe is a true stunner, there’s plenty of room for creative variations. Try swapping out the cinnamon sticks for a mix of warm spices like allspice, cloves, and cardamom. Or add a dash of turmeric for a vibrant yellow hue and a hint of earthy flavor.
For a spicy twist, toss in some sliced jalapeños or red pepper flakes. And if you’re feeling adventurous, experiment with different types of vinegar, like apple cider or red wine, to change up the flavor profile.
Making bread and butter pickle recipe Diet-Friendly
Believe it or not, this bread and butter pickle recipe is actually quite versatile when it comes to dietary restrictions. For a gluten-free version, simply make sure to use gluten-free vinegar. And for a vegan twist, you can easily omit the garlic and replace the sugar with a plant-based sweetener like maple syrup or agave.
If you’re watching your carb intake, you can reduce the amount of sugar in the brine and still end up with a delicious, low-carb pickle. Just be mindful that the fermentation process does produce natural sugars, so the final product may still have a touch of sweetness.
Frequently Asked Questions
Q: Can I use a different type of cucumber for this recipe?
A: While Grandma’s recipe calls for a mix of pickling and English cucumbers, you can certainly experiment with other varieties. Just keep in mind that the texture and flavor may vary. Slicing thinner or thicker could also impact the final crunch factor.
Q: How long do the bread and butter pickles need to ferment?
A: The fermentation process for this recipe takes 7-10 days. It’s important to be patient and let the flavors develop fully. You’ll know the pickles are ready when they have a satisfying crunch and the brine has a slightly cloudy appearance.
Q: Can I store the pickles at room temperature?
A: No, once the fermentation is complete, you’ll want to transfer the jars to the refrigerator. The cool temperature will help preserve the crunch and prevent any further fermentation.
Q: How much does this recipe make?
A: This bread and butter pickle recipe will fill approximately 3-4 standard-sized mason jars, depending on the size of your cucumber slices and how tightly you pack the jars. The yield can vary, but it’s generally a good amount to share with family and friends.
Q: What if my pickles turn out too soft?
A: If your bread and butter pickles end up a bit softer than you’d like, don’t worry! Next time, try slicing the cucumbers a bit thicker or letting the jars ferment for a few extra days. You can also try adding a teaspoon of alum to the brine, which will help maintain that signature crunch.
Conclusion
There’s nothing quite like the taste of homemade bread and butter pickles, and this recipe from my grandma is truly the best of the best. With its perfect balance of sweet and tangy flavors, combined with that satisfying crunch, it’s no wonder this has become a family staple that we all cherish.
I hope you’ll give this recipe a try and experience the magic for yourself. Grandma would be so proud to know that her special creation is being shared and enjoyed by a whole new generation. So what are you waiting for? Get pickling and let me know how your bread and butter pickles turn out!