
Growing up, blackberry pie was always the centerpiece of my family’s summer gatherings. I can still vividly remember the delightful aromas wafting through the kitchen as my grandma carefully tended to the bubbling berry-filled crust. It was a true labor of love, and we all eagerly anticipated that first, perfectly tart and sweet bite.
Grandma’s blackberry pie was an institution in our small town, and people would come from miles around to get a slice. She’d spend hours meticulously hand-picking the plumpest, juiciest blackberries from the bushes that lined the property, making sure each one was just right. Then, with a practiced hand, she’d mix them with a touch of sugar, a pinch of flour, and a squeeze of lemon to create the most irresistible filling.
As a kid, I loved watching her work the dough, expertly rolling it out and carefully laying it in the pie dish. The way she’d crimp the edges and cut those signature slits in the top crust was mesmerizing. And the moment that piping hot pie emerged from the oven, with its golden-brown top and those tantalizing bubbles peeking through, I just couldn’t wait to dig in.
Why This Blackberry Pie Recipe Will Become Your Go-To
The Secret Behind Perfect Blackberry Pie
What makes this blackberry pie recipe so special is the perfect balance of sweet and tart, achieved through a carefully curated blend of ingredients and techniques. The key is in the berry selection – we’re talking about plump, juicy blackberries at the peak of ripeness, which lend an intense, almost jammy flavor to the filling. But we temper that boldness with just the right amount of sugar and a touch of lemon juice to brighten everything up.
And the crust? Oh, the crust. It’s a masterclass in flaky, buttery perfection, with a sturdy yet tender texture that perfectly complements the vibrant berry filling. This is a pie that will have your family and friends raving, wondering how you managed to create such a heavenly dessert.
Essential Ingredients You’ll Need
- Blackberries: Fresh, ripe blackberries are the star of the show. Look for plump, juicy berries that are deep in color.
- Sugar: Granulated sugar helps balance the tartness of the blackberries and creates the perfect sweet-tart flavor profile.
- Lemon Juice: A squeeze of fresh lemon juice enhances the berry flavor and adds a lovely brightness to the filling.
- Flour: A bit of all-purpose flour helps thicken the blackberry filling and prevent it from becoming too runny.
- Butter: For the flakiest, most irresistible crust, we’re using a combination of cold butter and shortening.
- Pie Crust: You can use a store-bought crust, or make your own using my easy homemade recipe.
Step-by-Step Blackberry Pie Instructions
Preparing Your Blackberry Pie
This blackberry pie is a labor of love, but the end result is so worth it. With a total prep and baking time of around 2 hours, you’ll need to set aside a bit of time to create this masterpiece. But don’t worry – the steps are straightforward, and I’ll walk you through each one to ensure your pie turns out perfectly.
1- Begin by making your pie crust. If you’re using a store-bought crust, make sure to allow it to thaw completely before using. If you’re making your own crust, prepare it according to the recipe and chill it for at least 30 minutes before rolling it out.
2- In a large bowl, gently toss the blackberries with the sugar, lemon juice, and flour until the berries are evenly coated.
3- Roll out one of the chilled pie dough discs into a 12-inch circle. Carefully transfer it to a 9-inch pie plate, pressing it into the bottom and up the sides.
4- Spoon the blackberry filling into the prepared pie crust, making sure to spread it out evenly. Dot the top with small pieces of butter.
5- Roll out the second pie dough disc and place it over the filling. Crimp the edges to seal, and cut several slits in the top to allow steam to escape.
6- Bake the pie at 400°F for 25 minutes, then reduce the temperature to 375°F and continue baking for an additional 30-35 minutes, until the crust is golden brown and the filling is bubbling.
Pro Tips for Success
- Be sure to use ripe, juicy blackberries for the best flavor.
- Don’t overfill the pie – leave a bit of room at the top for the filling to bubble up without spilling over.
- If the crust is browning too quickly, cover the edges with foil or a pie crust shield to prevent burning.
- Let the pie cool completely before slicing to allow the filling to set up properly.
Serving and Storing Your Blackberry Pie
Perfect Pairings for Blackberry Pie
Blackberry pie is a true crowd-pleaser that pairs beautifully with a scoop of vanilla ice cream or a dollop of freshly whipped cream. For a more grown-up twist, try serving it with a drizzle of sweet port or a splash of brandy. And don’t forget the classic glass of cold milk – it’s the perfect accompaniment to this indulgent dessert.
Storage and Make-Ahead Tips
Leftover blackberry pie can be stored, covered, at room temperature for up to 3 days. For longer storage, it can be refrigerated for up to 5 days. To reheat, simply pop a slice in the oven at 350°F for 10-15 minutes until warmed through.
This blackberry pie also freezes exceptionally well. Bake it as directed, allow it to cool completely, then wrap tightly in plastic wrap and aluminum foil. It will keep in the freezer for up to 3 months. When ready to serve, thaw overnight in the refrigerator and reheat as directed above.
Variations and Dietary Adaptations for Blackberry Pie
Creative Blackberry Pie Variations
While this classic blackberry pie is tough to beat, there are plenty of ways to put a unique spin on it. For a touch of elegance, you could try adding a layer of cream cheese or mascarpone to the filling. Or, for a seasonal twist, swap in a mix of blackberries and raspberries or blueberries.
Making Blackberry Pie Diet-Friendly
To make this blackberry pie gluten-free, simply substitute your favorite gluten-free pie crust recipe or pre-made crust. For a vegan version, use a plant-based butter or shortening in the crust and omit the butter in the filling. And for a lower-carb take, you can reduce the sugar in the filling and serve the pie with a dollop of unsweetened whipped cream.
Frequently Asked Questions
Q: Can I use frozen blackberries instead of fresh?
A: Absolutely! Frozen blackberries work great in this recipe. Just make sure to thaw them completely and pat them dry before using to prevent a soggy crust.
Q: How do I know when the pie is done baking?
A: The crust should be a deep golden brown, and the filling should be bubbling vigorously around the edges. You can also do the classic “knife test” – insert a sharp knife into the center of the pie; if it comes out clean, the pie is ready.
Q: Can I make this pie ahead of time?
A: Yes, this blackberry pie is perfect for making in advance. You can bake it up to 5 days ahead of time and store it in the refrigerator. Just be sure to reheat it briefly in the oven before serving to crisp up the crust.
Q: How should I serve the blackberry pie?
A: This pie is delicious on its own, but it’s even better with a scoop of vanilla ice cream or a dollop of whipped cream. It’s also wonderful paired with a cup of coffee or a glass of milk.
Q: What if my filling is too runny?
A: If your blackberry pie filling seems a bit too loose, don’t worry – it’s an easy fix. Next time, try increasing the amount of flour in the filling by 1-2 tablespoons. This will help absorb more of the berry juices and result in a nicely thickened, yet still juicy, filling.

Grandma’s Irresistible Blackberry Pie Recipe
- Total Time: 60
- Yield: 8
Description
Indulge in the ultimate homemade Blackberry Pie, a classic recipe passed down from Grandma. Bursting with juicy, plump blackberries and baked to perfection in a flaky, buttery crust, this dessert is sure to delight your taste buds.
Ingredients
– 2 cups fresh blackberries
– 1 cup granulated sugar
– 1/4 cup all-purpose flour
– 1 tablespoon lemon juice
– 1/4 teaspoon ground cinnamon
– 1 pre-made pie crust
– 1 tablespoon unsalted butter, cubed
Instructions
1. 1. Preheat your oven to 400°F (200°C).
2. 2. In a large bowl, gently toss the blackberries, sugar, flour, lemon juice, and cinnamon until well combined.
3. 3. Roll out the pie crust and place it in a 9-inch pie dish. Carefully pour the blackberry filling into the crust.
4. 4. Dot the top of the filling with the cubed butter.
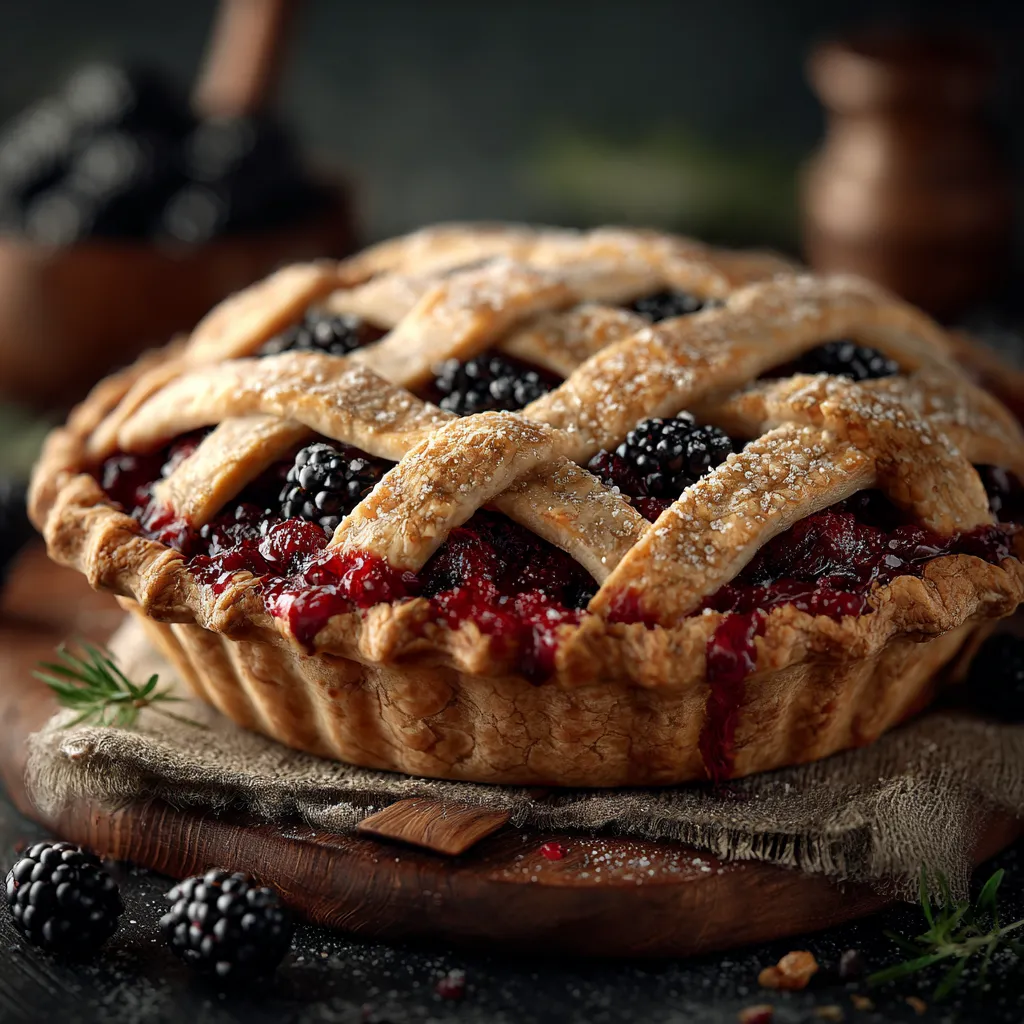
5. 5. Roll out the remaining pie crust and cut into strips. Arrange the strips in a lattice pattern over the top of the pie.
6. 6. Bake the pie for 25-30 minutes, or until the crust is golden brown and the filling is bubbly.
7. 7. Reduce the oven temperature to 375°F (190°C) and continue baking for an additional 20-25 minutes, or until the crust is deep golden brown.
8. 8. Allow the pie to cool completely before slicing and serving, about 2-3 hours.
Notes
For a flakier crust, use a combination of butter and shortening. You can also add a teaspoon of vanilla extract to the filling for extra flavor. Serve with a scoop of vanilla ice cream or a dollop of whipped cream for an extra special treat.
- Prep Time: 15
- Cook Time: 45
- Category: Dessert
- Method: Baking
- Cuisine: American
Conclusion
There’s just something so comforting and nostalgic about a homemade blackberry pie, isn’t there? This recipe is sure to become a new family favorite, with its perfectly balanced flavors and that flaky, buttery crust. I hope you’ll give it a try – I know your loved ones will be begging for seconds (or thirds!). And don’t forget to let me know how it turns out in the comments below. Enjoy!