
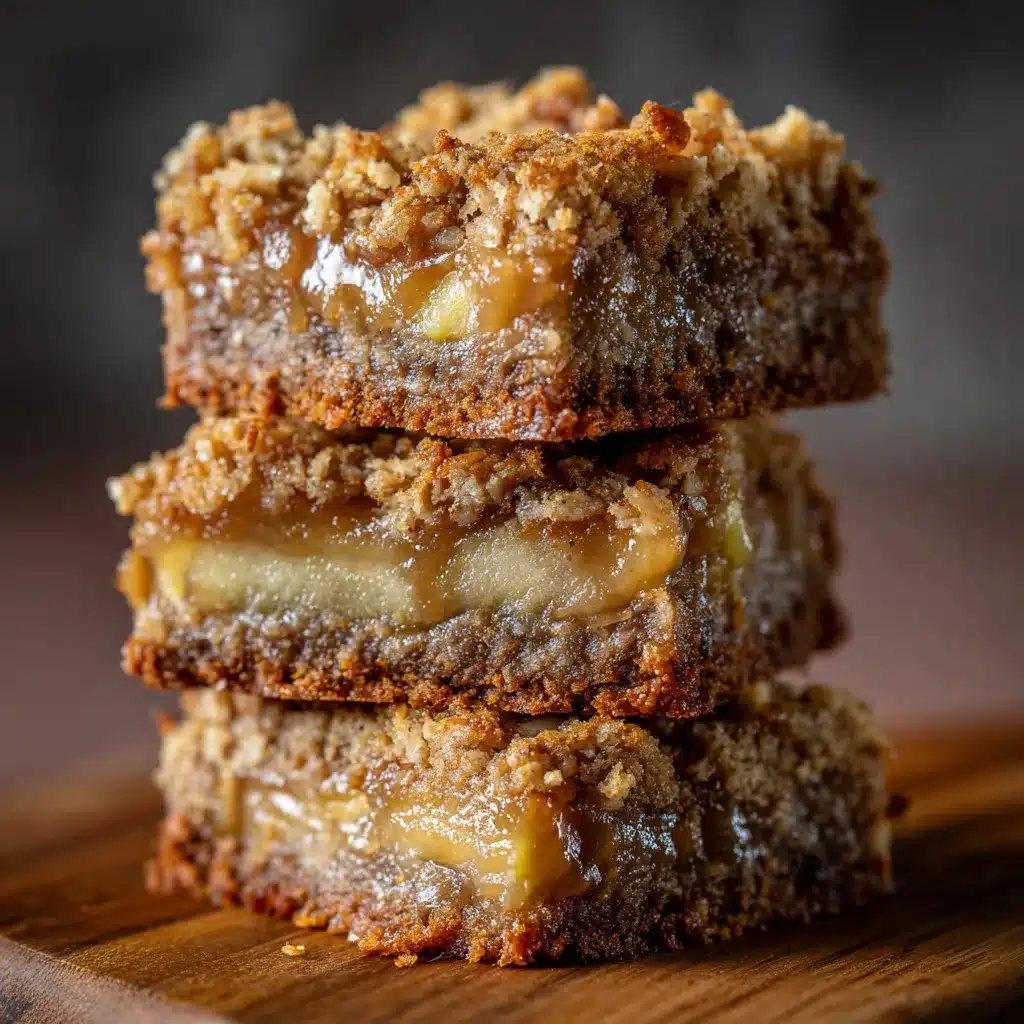
My mom’s Apple Crisp Bars were always the star of the show at our family gatherings. I can still remember the mouthwatering aroma wafting through the house as they baked, drawing us all straight to the kitchen. There was just something about that perfect balance of sweet apples, buttery crumble, and a hint of cinnamon that made it impossible to resist grabbing a second (or third!) square. To this day, it’s the recipe I turn to whenever I need a comforting, crowd-pleasing dessert.
Why This Apple Crisp Bars Recipe Will Become Your Go-To
The secret behind these incredible Apple Crisp Bars is in the technique. Most recipes call for simply tossing the apples with sugar and cinnamon, but I’ve found that a quick pre-cooking step makes all the difference. By sautéing the apple slices in a bit of butter first, you can ensure they’re perfectly tender and release their juices, resulting in a beautifully gooey filling. And the crumble topping? It’s the perfect balance of crispy and buttery, with just the right amount of sweetness to complement the apples.
The Secret Behind Perfect Apple Crisp Bars
Trust me, once you try this recipe, you’ll be hooked. The flavors and textures are out of this world, and it’s surprisingly easy to make. Whether you’re baking for a special occasion or just craving a cozy dessert, these Apple Crisp Bars are sure to become a new family favorite.
Essential Ingredients You’ll Need
– Apples – I like to use a mix of tart Granny Smith and sweet Honeycrisp for the best flavor and texture.
– Butter – Unsalted butter is essential for both the filling and the crumble topping.
– Brown sugar – This adds depth of flavor and a gorgeous caramelized note to the bars.
– Cinnamon – The classic spice that pairs so perfectly with apples.
– Flour – All-purpose flour helps bind the crumble topping and thicken the apple filling.
– Oats – Old-fashioned oats give the crumble a wonderful chewy, nutty texture.
– Salt – Just a pinch to balance the sweetness.
Step-by-Step Apple Crisp Bars Instructions
Preparing Your Apple Crisp Bars
These Apple Crisp Bars are surprisingly easy to make, with a total prep and baking time of just about an hour. You’ll need a 9×13 baking dish, a skillet for pre-cooking the apples, and a few mixing bowls. Let’s get started!
1- Preheat your oven to 350°F and grease a 9×13 baking dish.
2- In a large skillet, melt 2 tablespoons of the butter over medium heat. Add the sliced apples and sauté for 5-7 minutes, until they’re just starting to soften.
3- Remove the apples from the heat and transfer them to a bowl. In the same bowl, toss the apples with 1/4 cup of the brown sugar and 1 teaspoon of the cinnamon.
4- In a separate bowl, make the crumble topping by cutting the remaining 1/2 cup of butter into the flour, oats, 1/2 cup brown sugar, and a pinch of salt until it resembles coarse crumbs.
5- Spread the apple mixture in an even layer in the prepared baking dish, then sprinkle the crumble topping evenly over the top.
6- Bake for 30-35 minutes, until the top is golden brown and the apples are bubbly. Let cool for at least 15 minutes before cutting into squares and serving.
Pro Tips for Success
The key to perfect Apple Crisp Bars is to not overcrowd the apples when sautéing them. Work in batches if needed to ensure they have enough space to release their juices and soften properly. Also, be sure not to over-bake the bars – you want the apples to be tender but still hold their shape, and the crumble topping should be crisp on the outside but still a bit soft on the inside.
Serving and Storing Your Apple Crisp Bars
Perfect Pairings for Apple Crisp Bars
These Apple Crisp Bars are delicious on their own, but they also pair beautifully with a scoop of vanilla ice cream or a dollop of whipped cream. For a cozy autumn gathering, try serving them with a mug of warm apple cider or a cup of strong coffee.
Storage and Make-Ahead Tips
Leftover Apple Crisp Bars will keep, covered, at room temperature for up to 3 days. For longer storage, you can refrigerate them for up to 1 week. To reheat, simply pop the bars back in a 350°F oven for 5-10 minutes until warmed through. These bars also freeze wonderfully – wrap them tightly and they’ll keep for up to 3 months. Just thaw overnight in the fridge before reheating.
Variations and Dietary Adaptations for Apple Crisp Bars
Creative Apple Crisp Bars Variations
If you’re feeling adventurous, there are so many ways to put your own spin on these Apple Crisp Bars. Try adding a handful of chopped pecans or walnuts to the crumble topping, or swirling in a bit of caramel sauce for extra gooey goodness. You could also experiment with different apple varieties or even add in some fresh or dried cranberries for a pop of tartness.
Making Apple Crisp Bars Diet-Friendly
To make these Apple Crisp Bars gluten-free, simply swap out the all-purpose flour for a 1-to-1 gluten-free flour blend. For a vegan version, use plant-based butter and omit the honey from the filling. And if you’re watching your carbs, you can reduce the amount of brown sugar in both the filling and the topping, or use a sugar-free substitute.
Frequently Asked Questions
Q: Can I use a different type of apple besides Granny Smith and Honeycrisp?
A: Absolutely! Feel free to experiment with other varieties like Fuji, Gala, or even a mix of apples. Just keep in mind that softer apples may release more liquid, so you may need to adjust the thickening a bit.
Q: How do I know when the Apple Crisp Bars are done baking?
A: The bars are ready when the top is golden brown and the apples are bubbly around the edges. You can also do the toothpick test – insert a toothpick into the center and it should come out clean.
Q: Can I make these Apple Crisp Bars ahead of time?
A: Yes, these bars freeze beautifully! Bake them as directed, let cool completely, then wrap tightly and freeze for up to 3 months. Thaw overnight in the refrigerator before reheating.
Q: How do I reheat leftover Apple Crisp Bars?
A: For best results, reheat the bars in a 350°F oven for 5-10 minutes until warmed through. You can also microwave individual servings in 30-second intervals.
Q: My bars are a bit soggy on the bottom – what did I do wrong?
A: If the bottom of the bars is soggy, it’s likely that the apples released too much liquid during baking. Make sure to thoroughly pat the apples dry after sautéing, and consider using a thicker sliced apple next time.

Apple Crisp Bars
- Total Time: 45
- Yield: 9
Description
Indulge in the perfect balance of sweet apples and crunchy oat topping with our easy 15-minute Apple Crisp Bars. This delightful dessert is sure to satisfy your sweet tooth and bring a taste of fall to your day.
Ingredients
– 4 cups sliced apples
– 1/2 cup brown sugar
– 1/2 cup all-purpose flour
– 1/2 cup rolled oats
– 1/2 cup butter, softened
– 1 teaspoon ground cinnamon
– 1/4 teaspoon ground nutmeg
Instructions
1. – Preheat oven to 375°F (190°C). Grease an 8×8-inch baking dish.
2. – In a large bowl, combine the sliced apples, brown sugar, 1/4 cup of the flour, and 1/4 cup of the rolled oats. Mix well and spread evenly in the prepared baking dish.
3. – In a separate bowl, mix the remaining 1/4 cup flour, 1/4 cup rolled oats, softened butter, cinnamon, and nutmeg until a crumbly topping forms.
4. – Sprinkle the oat topping evenly over the apple mixture.
5. – Bake for 30-35 minutes, or until the topping is golden brown and the apples are tender.
6. – Allow to cool for 10 minutes before serving. Enjoy warm, with a scoop of vanilla ice cream if desired.
Notes
– For a crisper topping, you can add 1/4 cup chopped pecans or walnuts to the oat mixture.
– Adjust the amount of sugar to your taste preferences, depending on the sweetness of the apples used.
– Store leftover bars in an airtight container at room temperature for up to 3 days.
- Prep Time: 15
- Cook Time: 30
- Category: Snacks & Desserts
- Method: Baking
- Cuisine: American
Conclusion
Trust me, once you try these amazing Apple Crisp Bars, they’re going to become a staple in your dessert repertoire. The combination of sweet, tender apples and the crisp, buttery topping is simply irresistible. Whether you’re baking for a crowd or just treating yourself, this recipe is sure to impress. So what are you waiting for? Preheat your oven and get ready to enjoy a cozy, comforting slice of apple heaven!